Maintenance Window
The Maintenance Window feature is used to assign maintenance rules to specific nodes for a defined time period, temporarily stopping monitoring and alert generation for those nodes. This is essential for planned maintenance activities, ensuring that unnecessary alerts are not triggered during scheduled downtime.
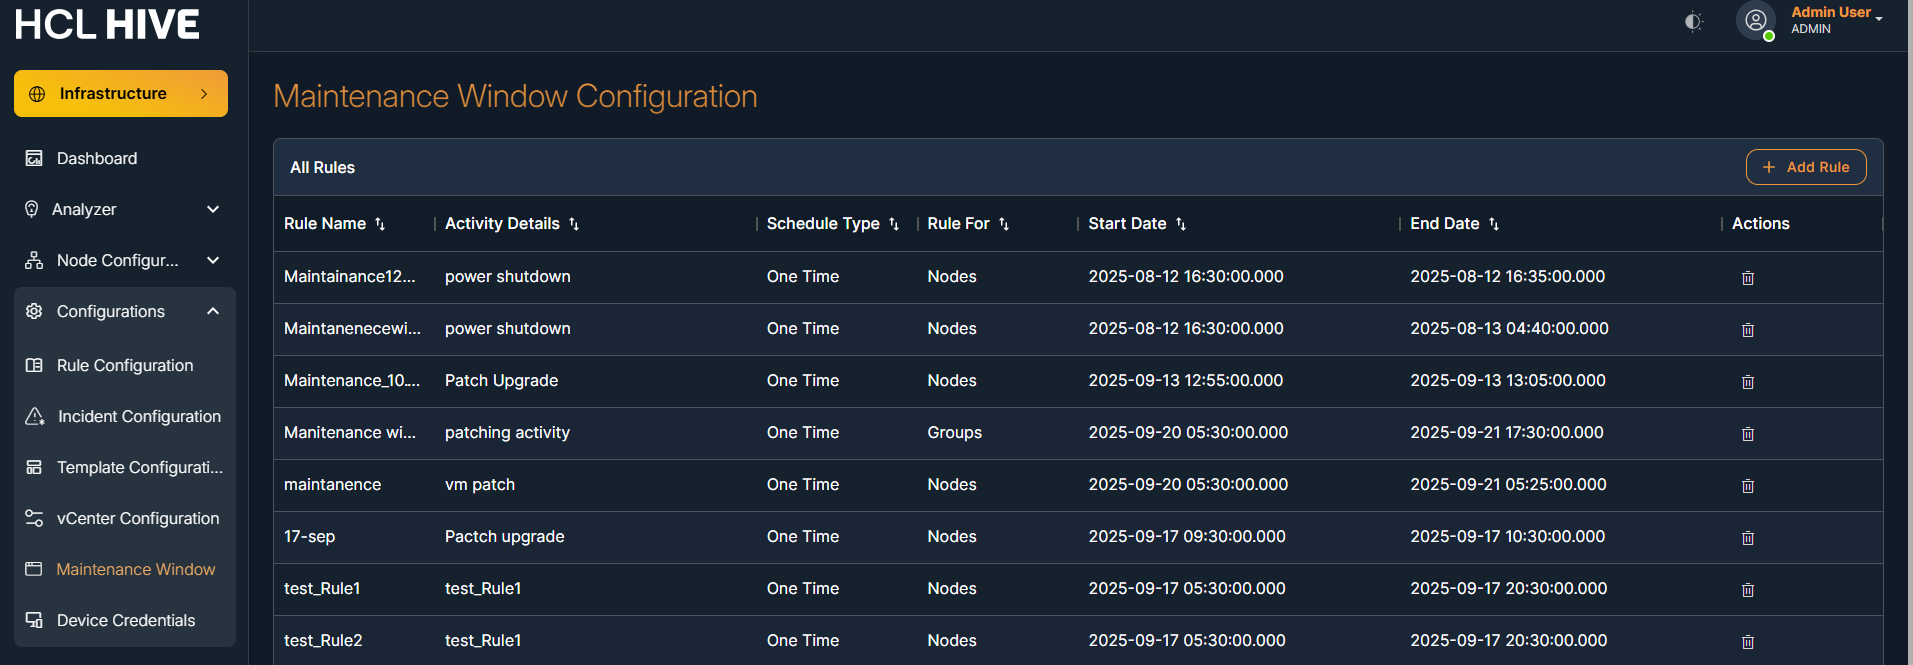
Navigation: Infrastructure → Configurations → Maintenance Window
Step to add Maintenance window Rule:
- Click “+ Add Rule” Button.
- Fill all the required input parameters
Figure 2. Figure - Maintenance window Add Rule 
- Select the occurrence type: one-time or recurring
- Click schedule
Schedule Type Description One Time In One Time Occurrence, the user sets the Start Date/Time and End Date/Time for the schedule. Recurring In Recurring Occurrence, the user sets the Start Date/Time and End Date/Time, and Selects to repeat the schedule daily, weekly, or monthly.
User will be redirected to the Maintenance Window Configuration
You can see the list of available schedules in All Rules Table
.png)
Note:
During the Maintenance Schedule time period, the selected
nodes will enter an unmonitored state and stop generating alerts, even if issues occur so you
don’t get unnecessary notifications.
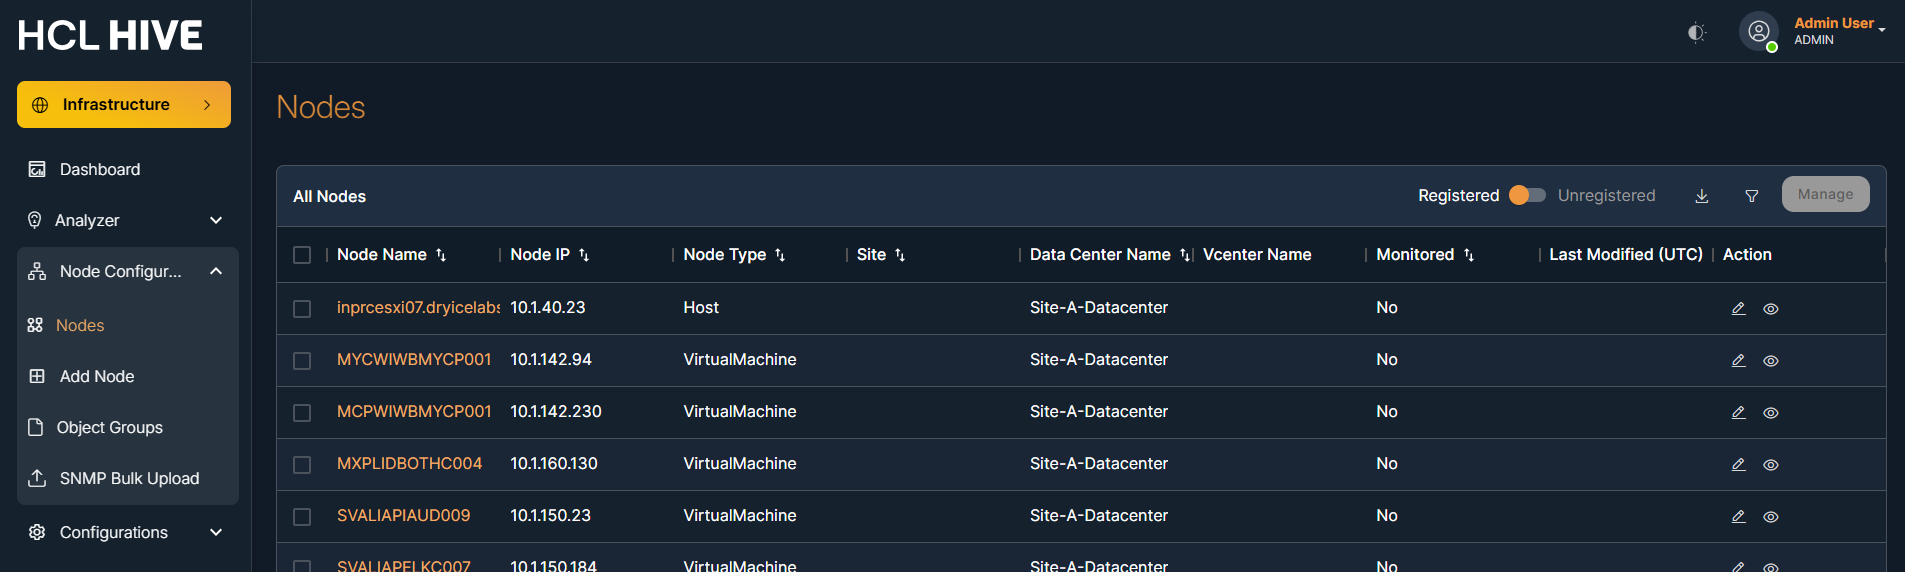
Note:
Users can verify this by checking the nodes table, where the
"Monitored Status" column will show the status changing from “Yes” to “No”.
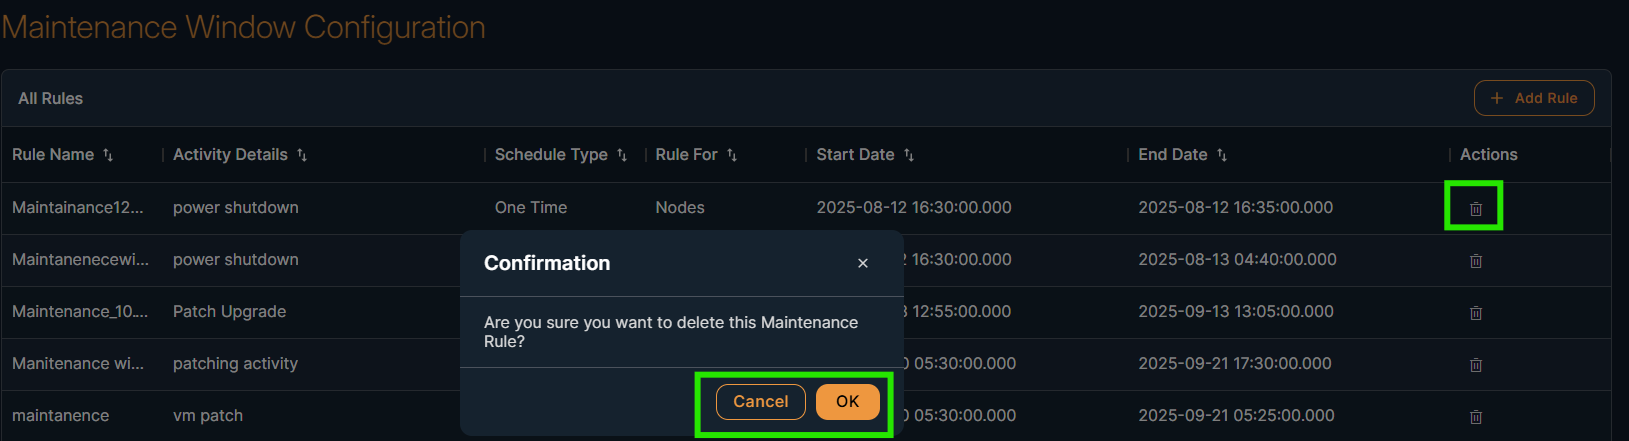
On the Maintenance Window Configuration screen , you can perform "Delete" operations
Steps to delete the Rule:
- Click delete icon
- Click OK to confirm the message in the pop-up dialog box.