The User section allows administrators to create and manage
individual user accounts. Each user can be assigned to user groups
or roles, which determine their access rights within the
application. This section ensures that each user has a unique
identity and appropriate permissions for their
responsibilities.
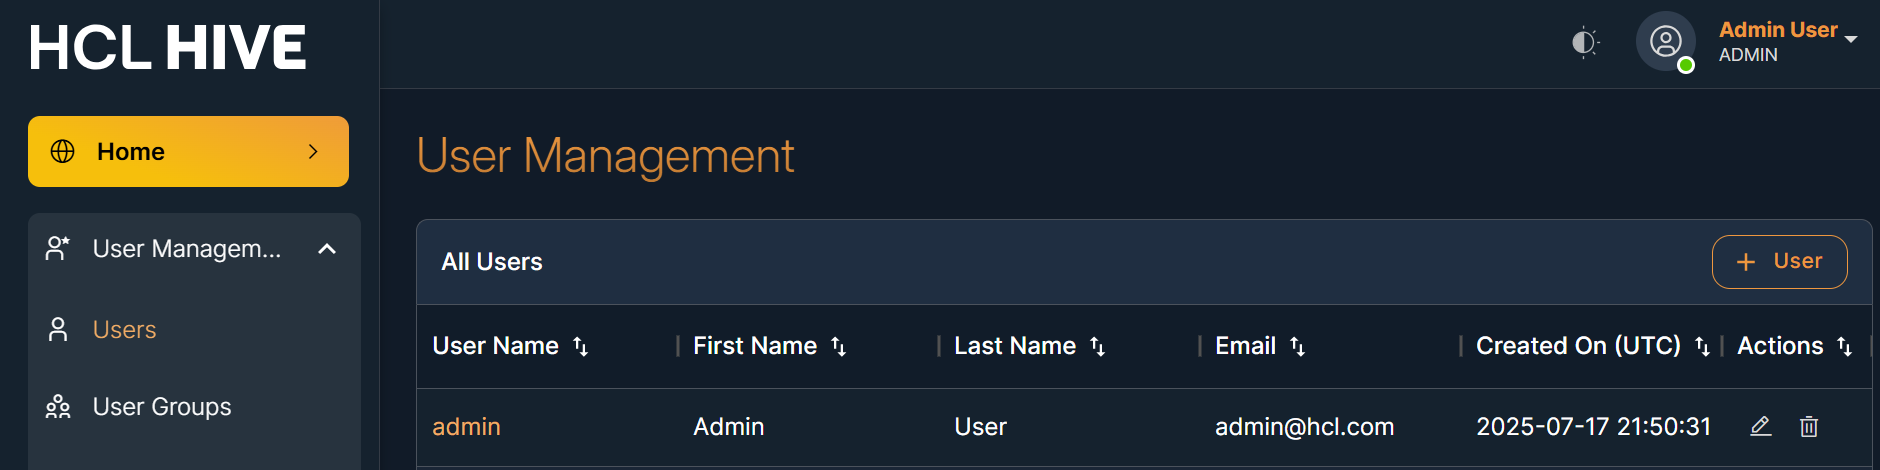
Navigation: User Management > User
You will see the user table with all existing users.Figure 1. Figure - User Management
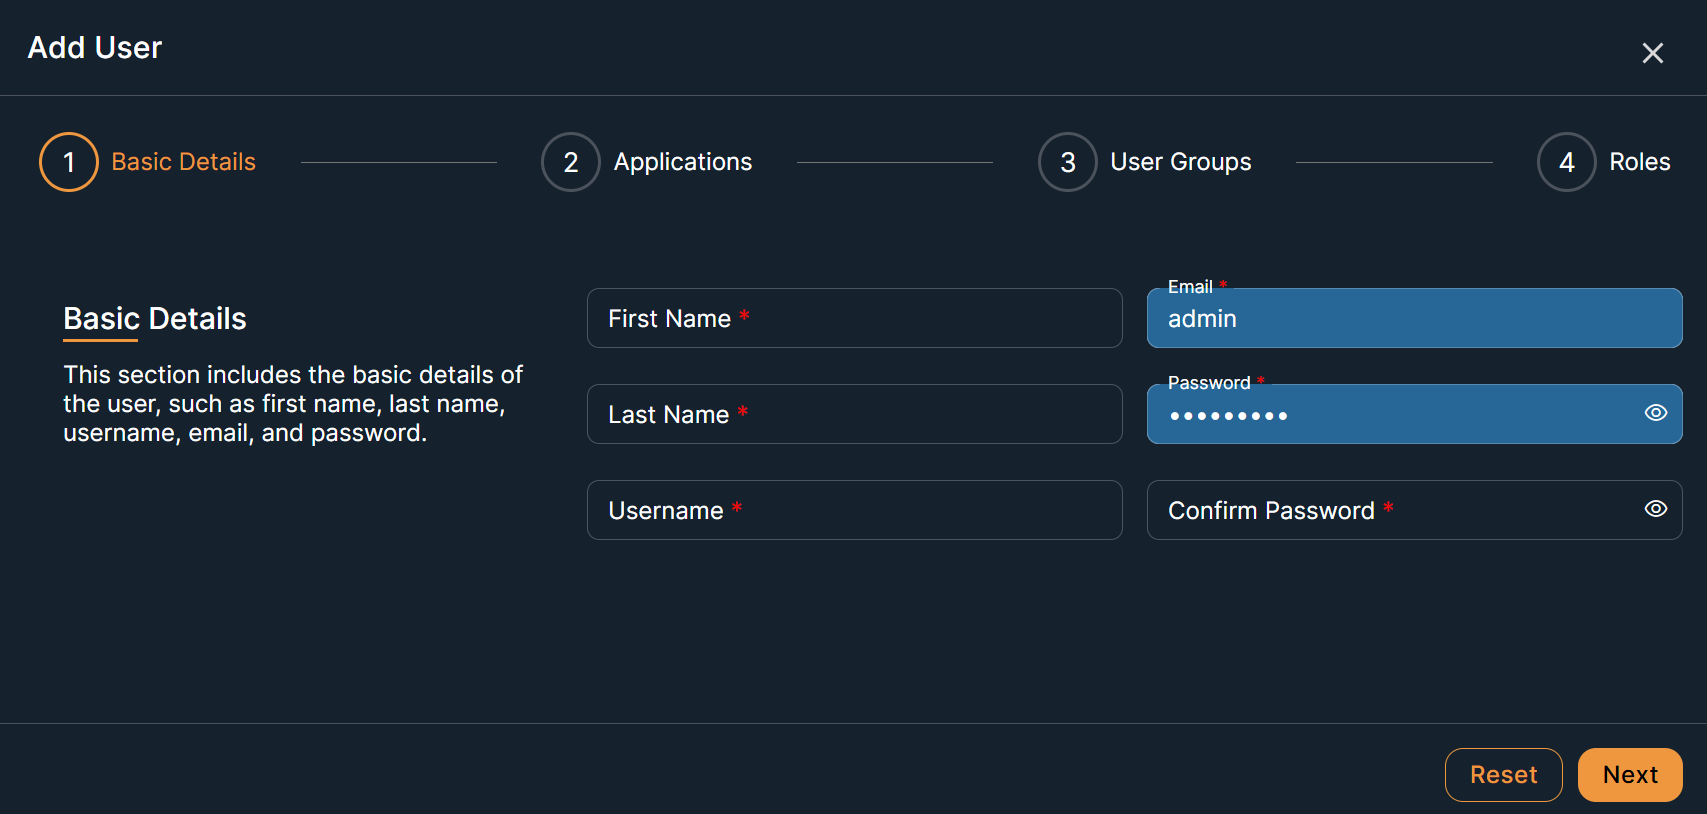
Steps to add user:
Click on the "+ User" button.
Fill in all the required data:
First name
Last name
Username
Email ID
Password and confirm password
Click on the "Next" buttonFigure 2. Figure - Add User
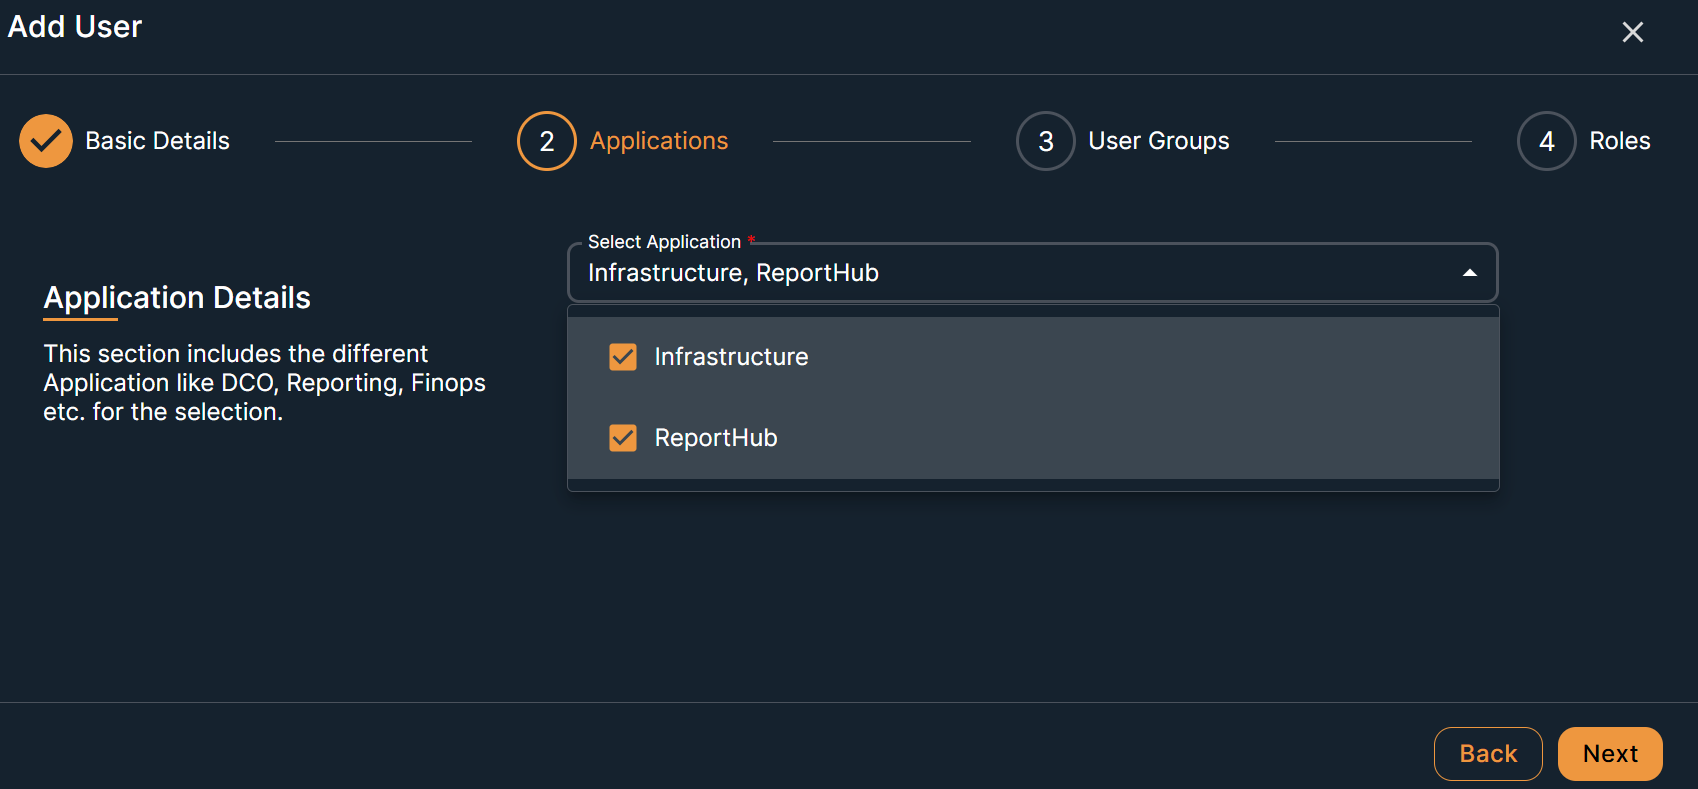
Select the Application from the dropdown list
Click on the "Next" buttonFigure 3. Figure - Select Application
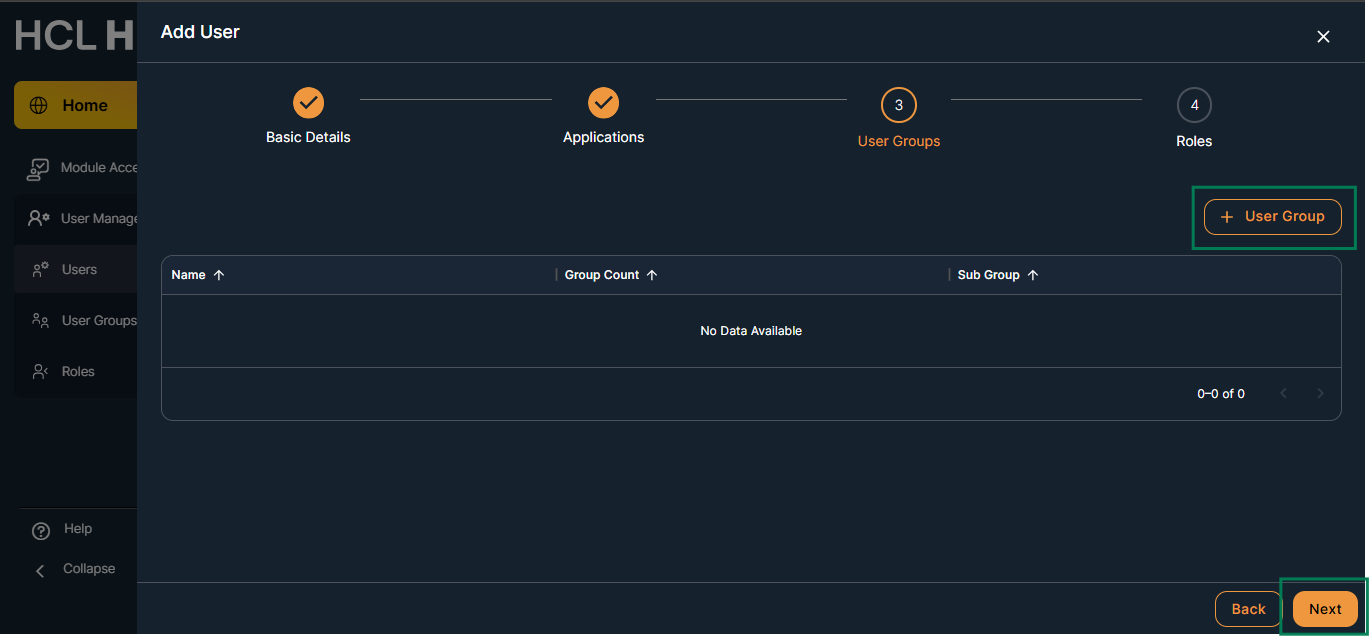
(Optional) Select the user group
Click on the “Next” buttonFigure 4. Figure - Add User Group
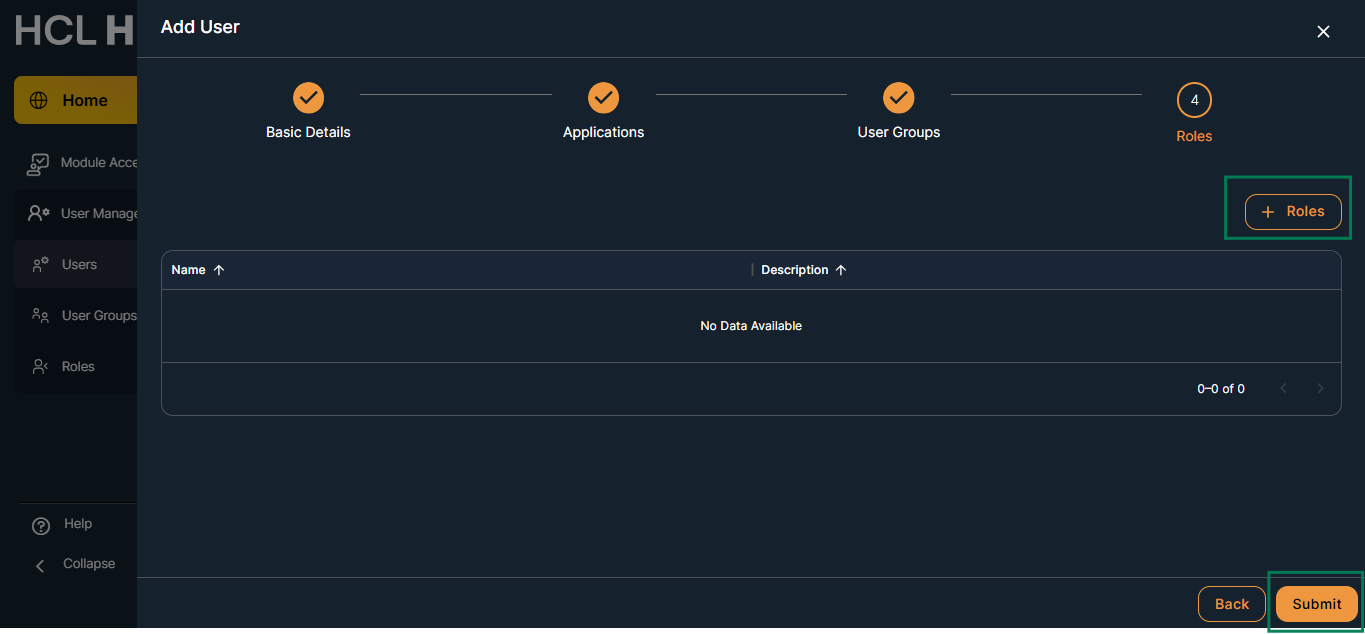
Optional Step - Select the role
Click Next
Note- If you don’t assign a role, the user won’t be able to access any screenFigure 5. Figure - Add Role (optional)
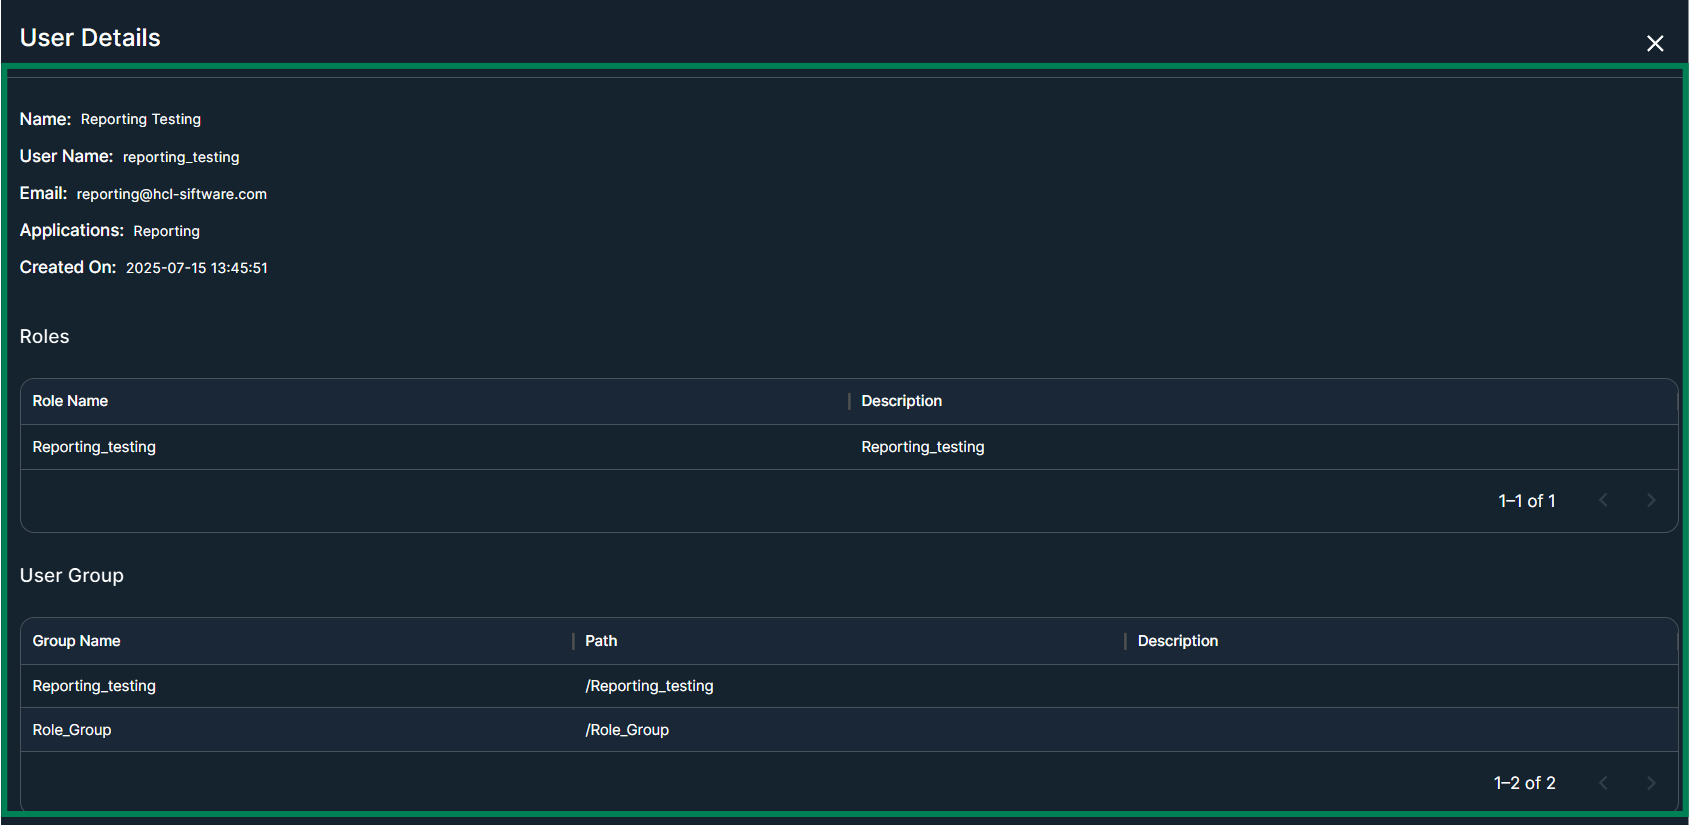
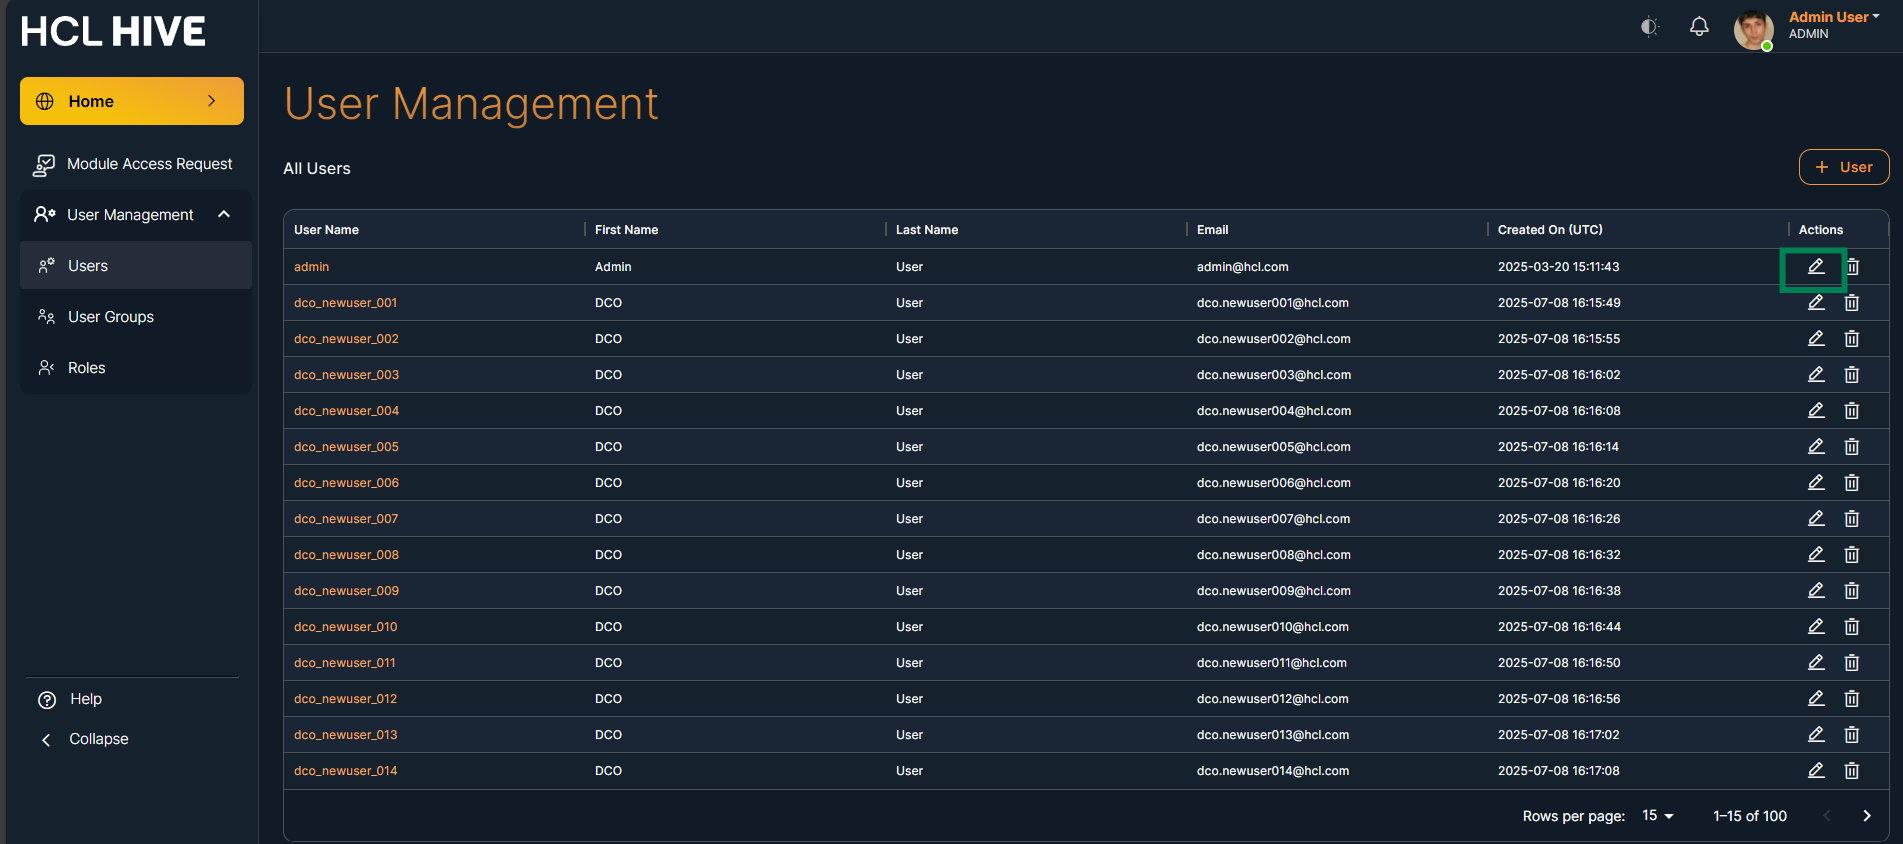
On the User Management screen, you can see a list of all
users
Click on username to view user details.Figure 6. Figure - All Users listFigure 7. Figure - Users details view
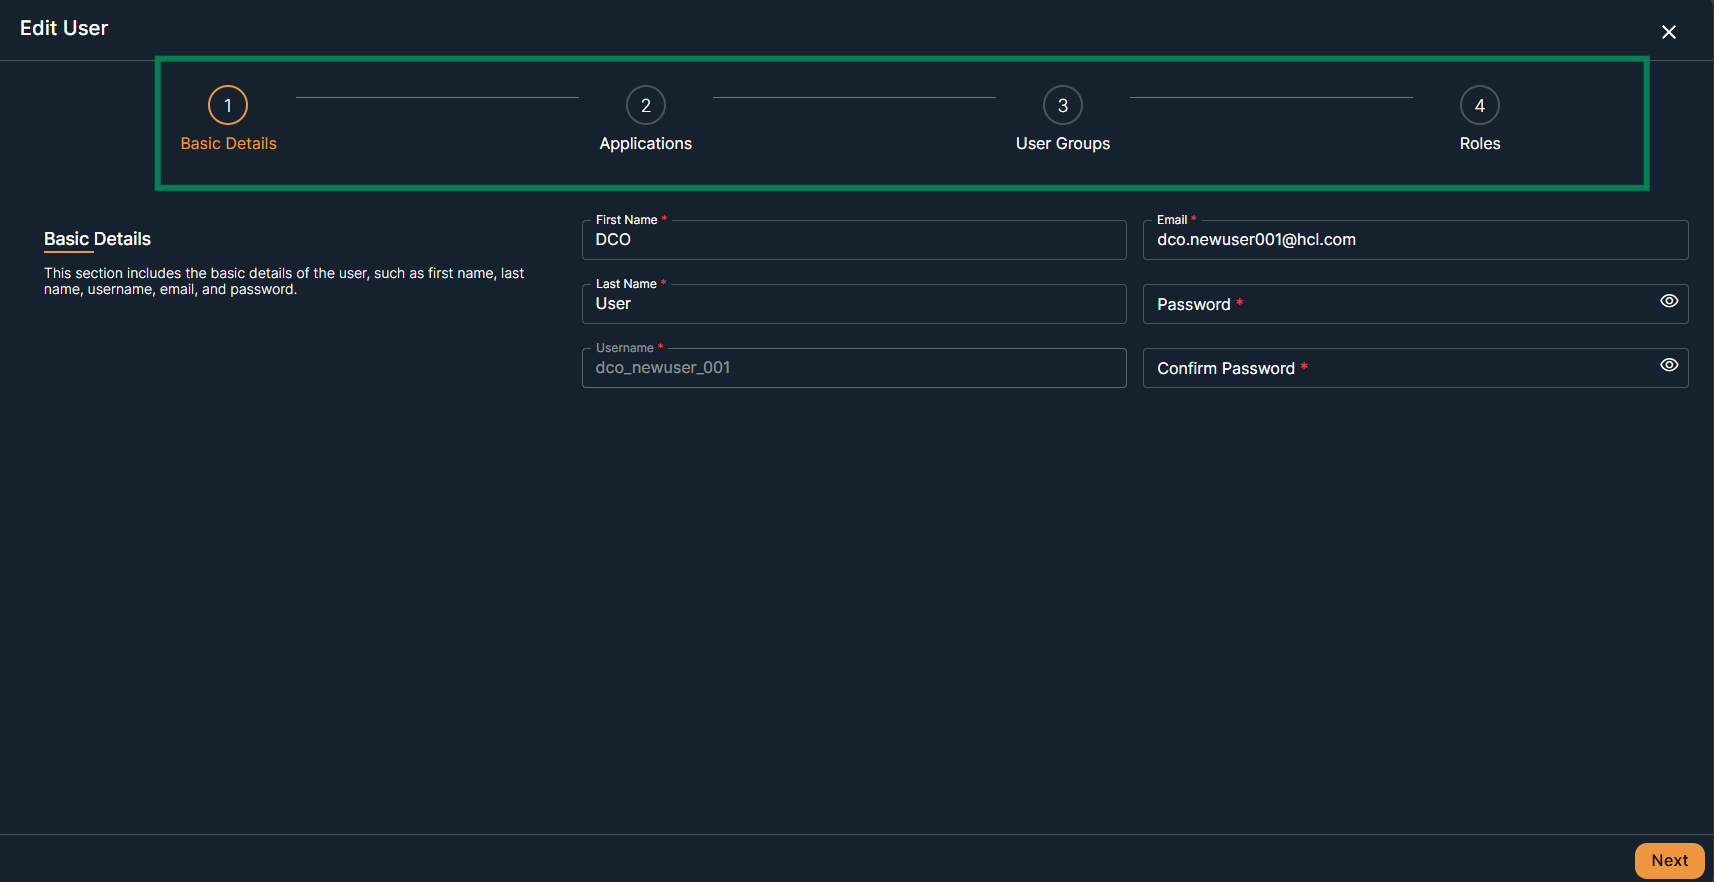
On the same screen, you can edit or delete usersFigure 8. Figure - Users Edit iconFigure 9. Figure - User Edit