
|
|
|
|
|
|
|
Do you want to be a better CNC'er in 37 Seconds? Get Better Tool Life, Surface Finish, and Material Removal Rates Fast. It's that easy. You can install and get results now. |
October through November 2008 CNC Cookbook Blog Archive
11/22/08
Robot Makes a Turner's Cube
Thanks to ilikec for sharing this video with me!
11/21/08
A 2-Jaw 3-Jaw Chuck: Road to an Eccentric Chuck?
This idea from Practical Machinist intrigued me:

You can see they've modified a 3-jaw chuck with soft jaws to act as a 2-jaw chuck. The 2nd jaw is fixed in position with enough clearance that the 2 jaws not in use can still move. The chuck was made for working on this part:
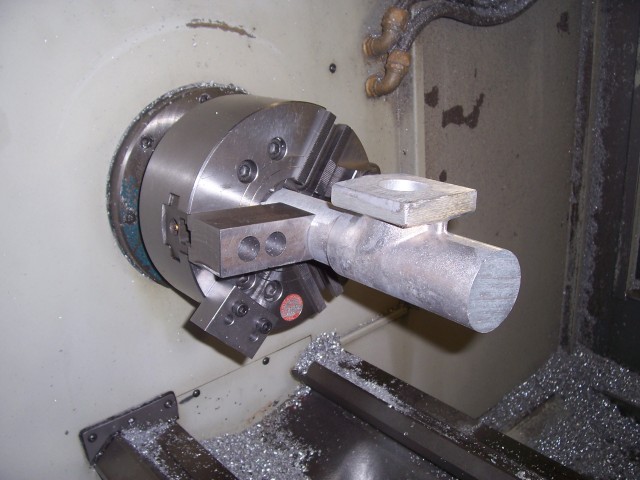
It's an intriguing solution, but the whole rig is pretty unbalanced as you could imagine, especially with such a big heavy part in the jaws.
But I'm wondering if it could be the basis for a specialized eccentric turning chuck. Imagine if that fixed jaw had a movable jaw that could be adjusted to create the offset with a precision screw and then locked. You would then have a quick way to load multiple pieces already set up for eccentric turning.
An Eccentric Turning Fixture for the 3-Jaw
I loved this idea presented by Wareagle on the HMEM board. It involves making a fixture to fit the 3-jaw chuck that holds the workpiece off-center. The piccys are pretty self-explanatory:
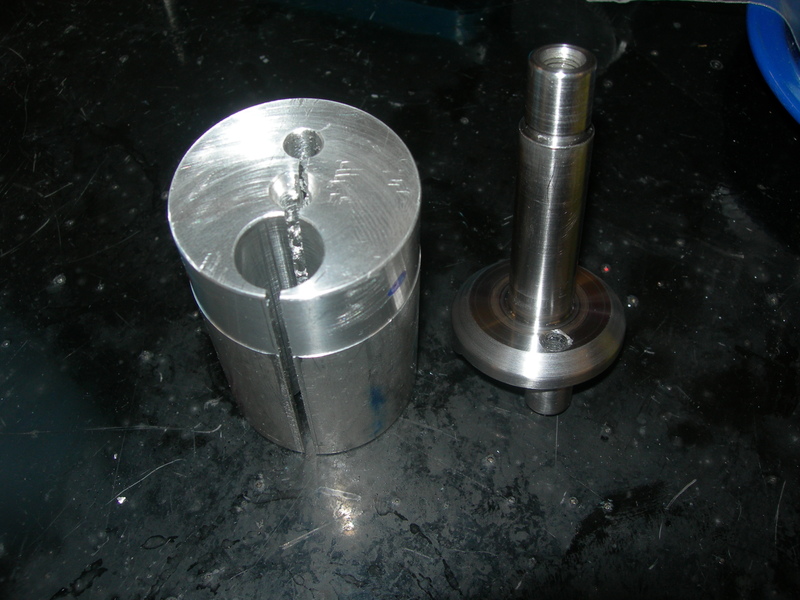

Such a fixture would be very easy to make with a mill and lathe. Turn your fixture, bore an offset whole in the mill, and then slit the side so it can "grip" the workpiece...For a bunch more eccentric turning ideas, see my page on eccentric turning.
Very Nice Spindle Spider for a Lathe
Check out this gorgeous spindle bar support system I found on the Chaski board:

The different sized bushings are held in the spindle by the friction of their o-rings. Personally, I'd like a little more positive locking action, but the basic style is very nice and a good idea to prevent the bar whipping as it spins. I've got to add this to my project wish list.
11/15/08
Everyone Should Have an Air Shear!
<I initially misidentified the air shear as an air nibbler, but a thoughtful reader sent an email correcting me.>
I did those cutouts below by drilling a hole in each corner of the cutout and then connecting the dots with my air shear. The drilling was done with an air tool as well--love those air tools!
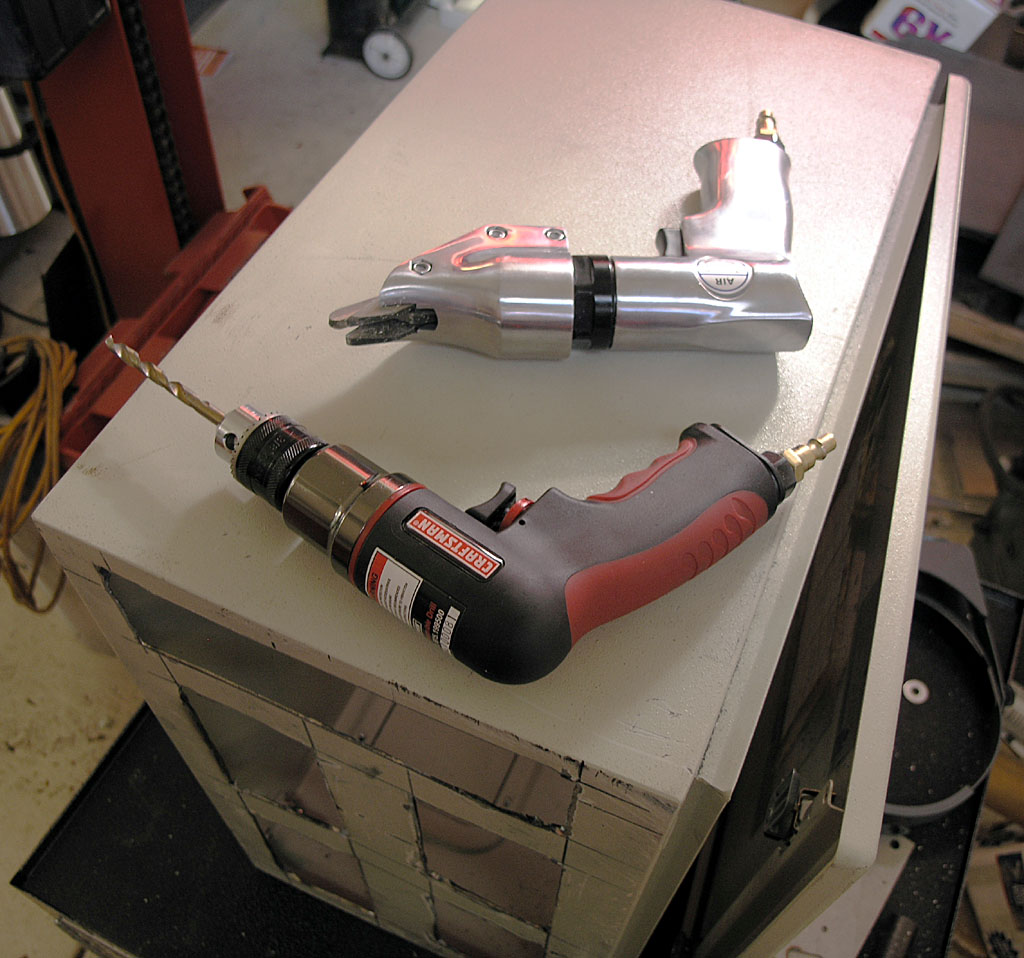
The cutouts were made by drilling a hole in each corner and then connecting the dots with an air shear...

The air shear has hardened jaws and went through the thick gauge steel box like butter...
A shear can be steered a little bit, but the tend to want to cut in a straight line. They curl up the chip vertically. The biggest issue is that sometimes that chip can push on the top of the shear and prevent the jaws from cutting further. The cutting action only happens along a very short length of the jaws. It helps to work the shear when it gets stuck. First try raising the handle to bend the chip out of the way. Then try rocking the shear on either side. That'll clear it 90% of the time. Sometimes you have to grab the chip with pliers and bend it up out of the way further if all else fails. I was surprised at how easily the shear cut through the thick gauge steel on my box.
Everyone needs a shear! Mine is just a cheap Harbor Freight model, but it works great.
Got Most of the Cutouts in the NEMA Enclosure
I will still need holes for the cooling fan, but I want to make sure I understand the clearances and location of everything else before I try to position the fan. My current thinking is to put it in the door next to the hinge and up high to exhaust the warm air. Wish I had a louver punch!
Here are some piccys:
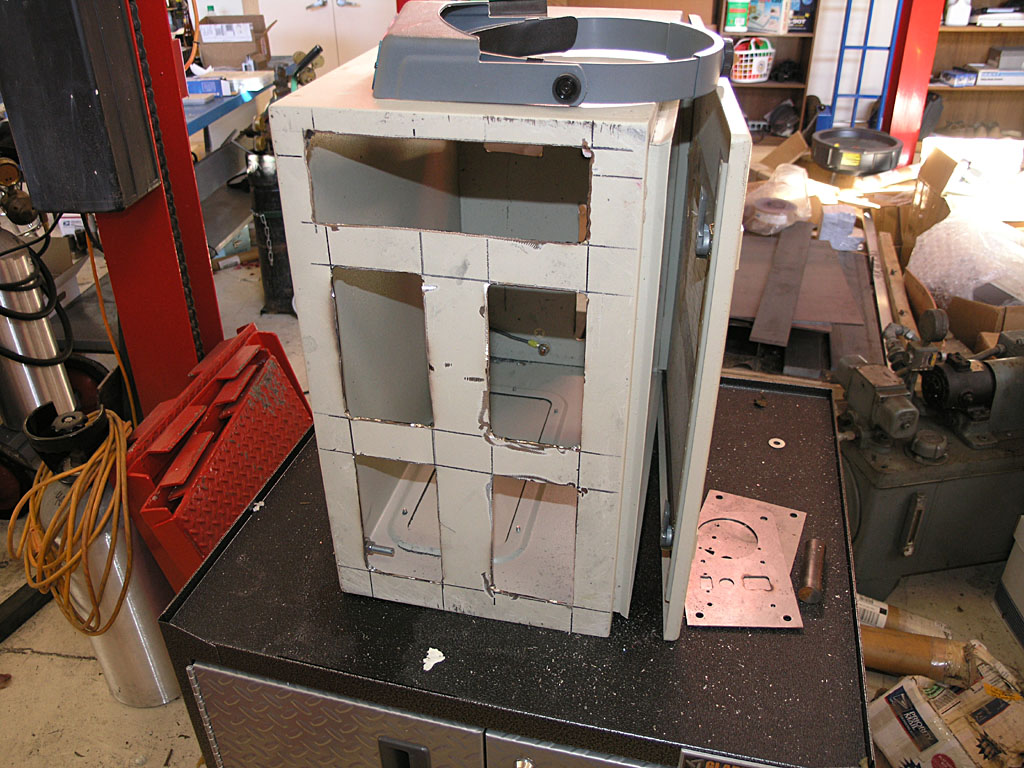
The panel inserts cover the holes. 4 axes on front, with a master control panel at the top. I could possibly also exhaust the fan at the right side of that control panel...
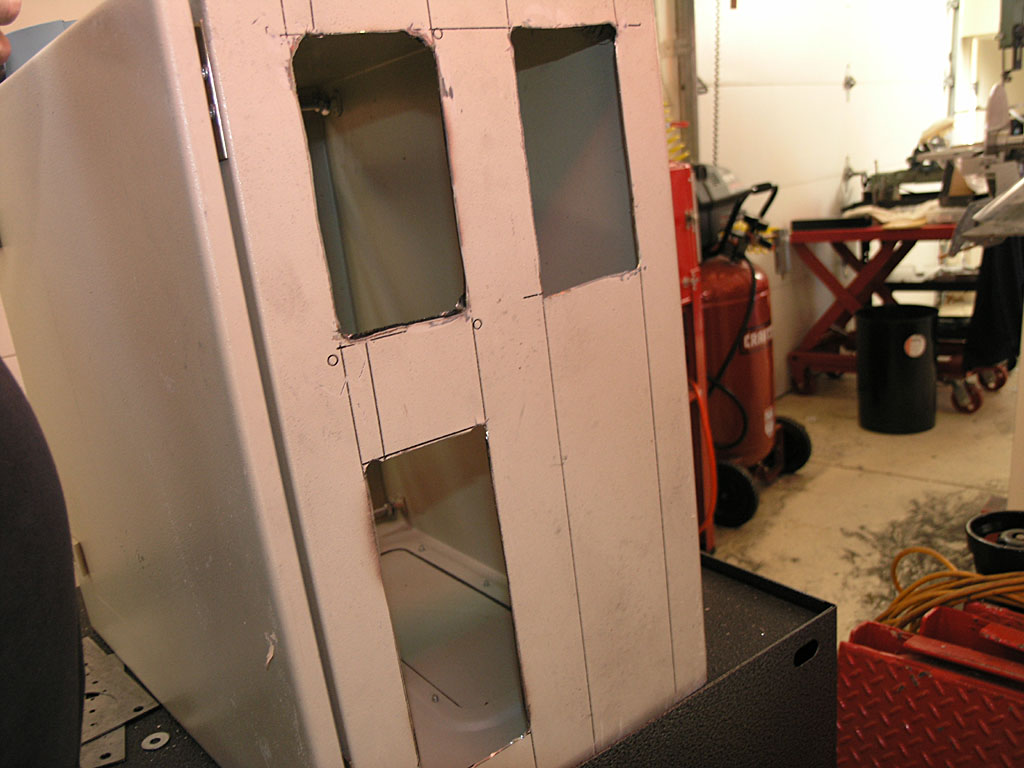
Three rear panel cutouts. Top 2 are for 2 more axes. Bottom will be for all the auxilliary connectors for limits, coolant relay control, and VFD control...
Some Progress on the Axis Modules
I've got one pretty well mocked up with all the parts mounted:
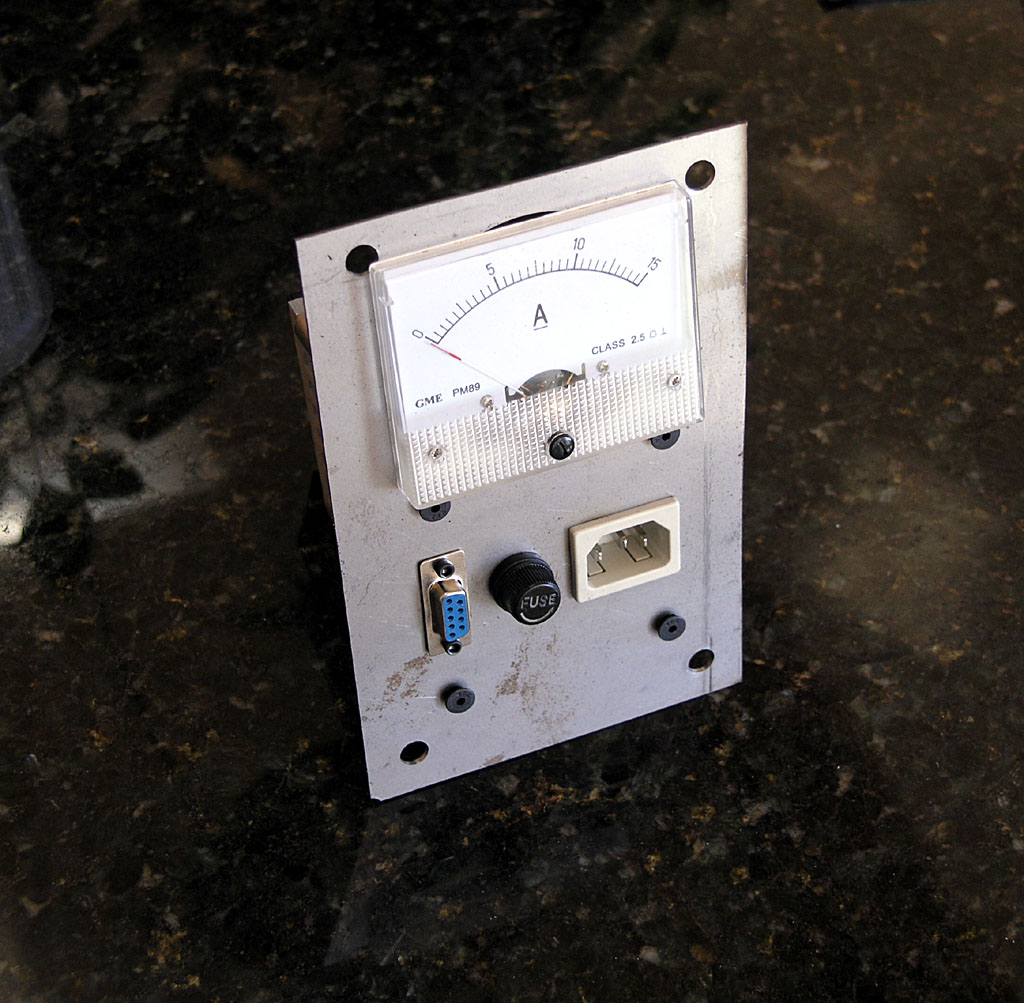
As you can see I have an issue with meter clearance and the mounting bolts, so I made an oversized hole to try to create some "wiggle room". This happened due to an error in laying out the big square face during the CAD design. What I need to do is relocate the whole meter 1/4" down the panel and all would be well.
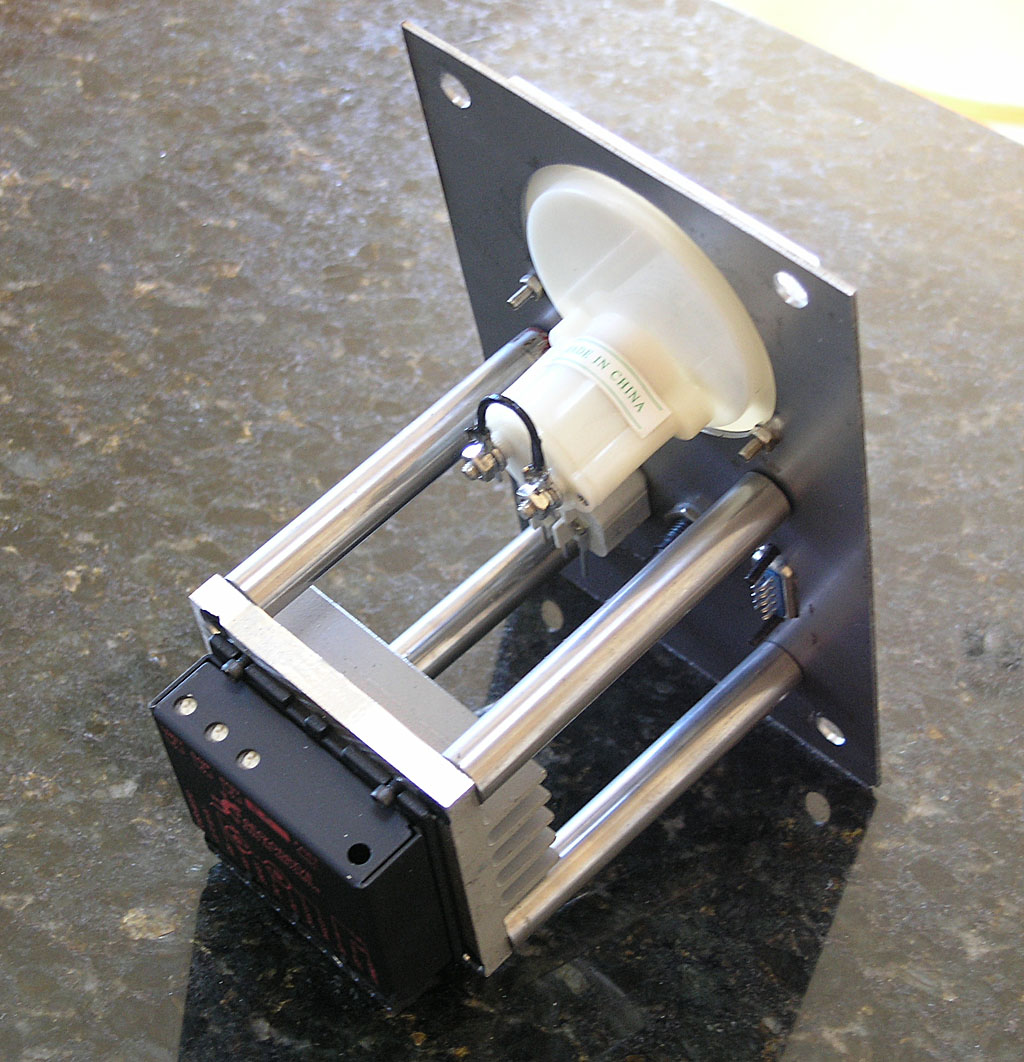
I've gotten it close enough, I think. I can't go much further or I'll lose the mounting holes for the meter as you can see in this behind shot. In the end, I'm planning to remake these panels anyway once the CNC is up and running. I'll make them out of 1/4" aluminum plate and put some engraving and other decorative touches on so they'll look a lot nicer.
Soldered the Cables on the Servo Motors
The servo motors for my IH mill CNC conversion come from Homeshopcnc with just a short tail on them, so you'll need to attach a longer cable back to you electronics cabinet. I decided to use IES-style power cords for mine. These are the same power cables a PC uses. I chose them becaues they're cheap, the servo only has 3 conductors like a power cord, and they're designed to carry current. My one reservation would be that they're not shielded, so the noise from the servos will escape. That means I need to take care the rest of the cables, for example the limit switch and encoder cables, are properly shielded for noise and the shields are grounded.
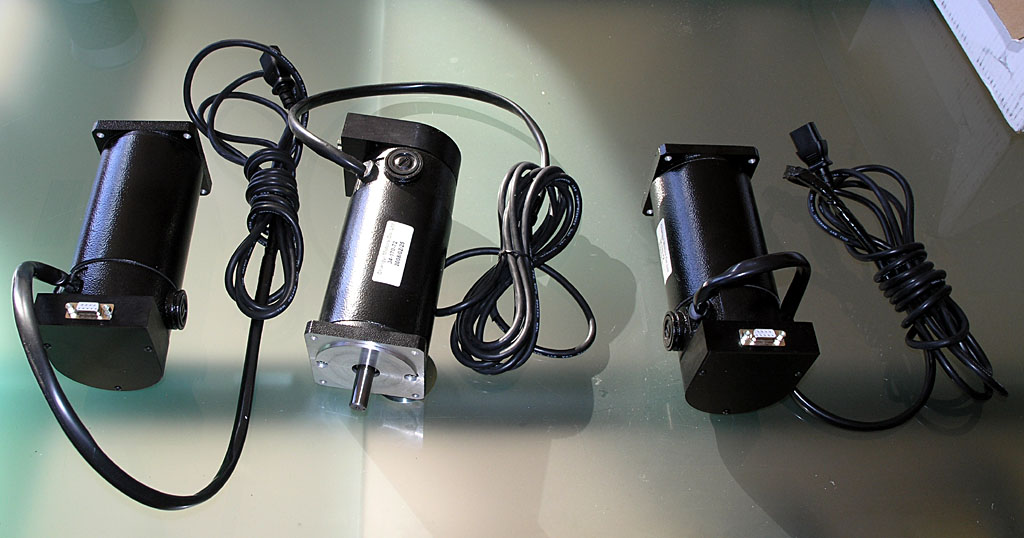
I put 10 foot power cords from CableWholesale on the motors...
11/5/08
Air Muscles: A Cool Robotics Power Source
I recently came across the Shadow Robot Company thanks to a post on HMEM. They do a lot of cool things, but among them is a robotic hand powered by air muscles. Air muscles are simple to construct. They're simply rubber tubes (such as bicycle innertube material) with a connector at either end. Pump air into the tube and expansion in the tube causes contraction of the muscle:
Air muscle contracts when air is pumped in...
According to shadow, a large 30mm diameter air muscle has a pull of 35 kg (about 70 lbs) at 3.5 bar of pressure, which would beabout 50 psi.
11/4/08
Drill versus Endmills
A twist drill can remove cubic inches of material faster than an endmill for nearly any situation. Consider chain drilling (drill a series of holes along the tool path) and then milling out the chain to a smooth surface. Also, when cutting a closed slot, start the slot by drilling a hole and then extend the hole with your endmill. If it's a production job, remember, you'll need to factor in tool change times if you introduce drilling to your process. Lastly, drill bits are often cheaper than endmills.
10/30/08
The "Beijing Deckel": Musings on a Simple Shopmade Tool and Cutter Grinder
Here is a sketch of what I think would make an effective single lip-style T&C grinder out of the homely (but useful) Harbor Freight Tool Grinder and a universal vise such as is commonly available on eBay:
For more details, see my page on this concept...
It would be easy to set up such an attachment so it swings out of the way when not in use.
10/29/08
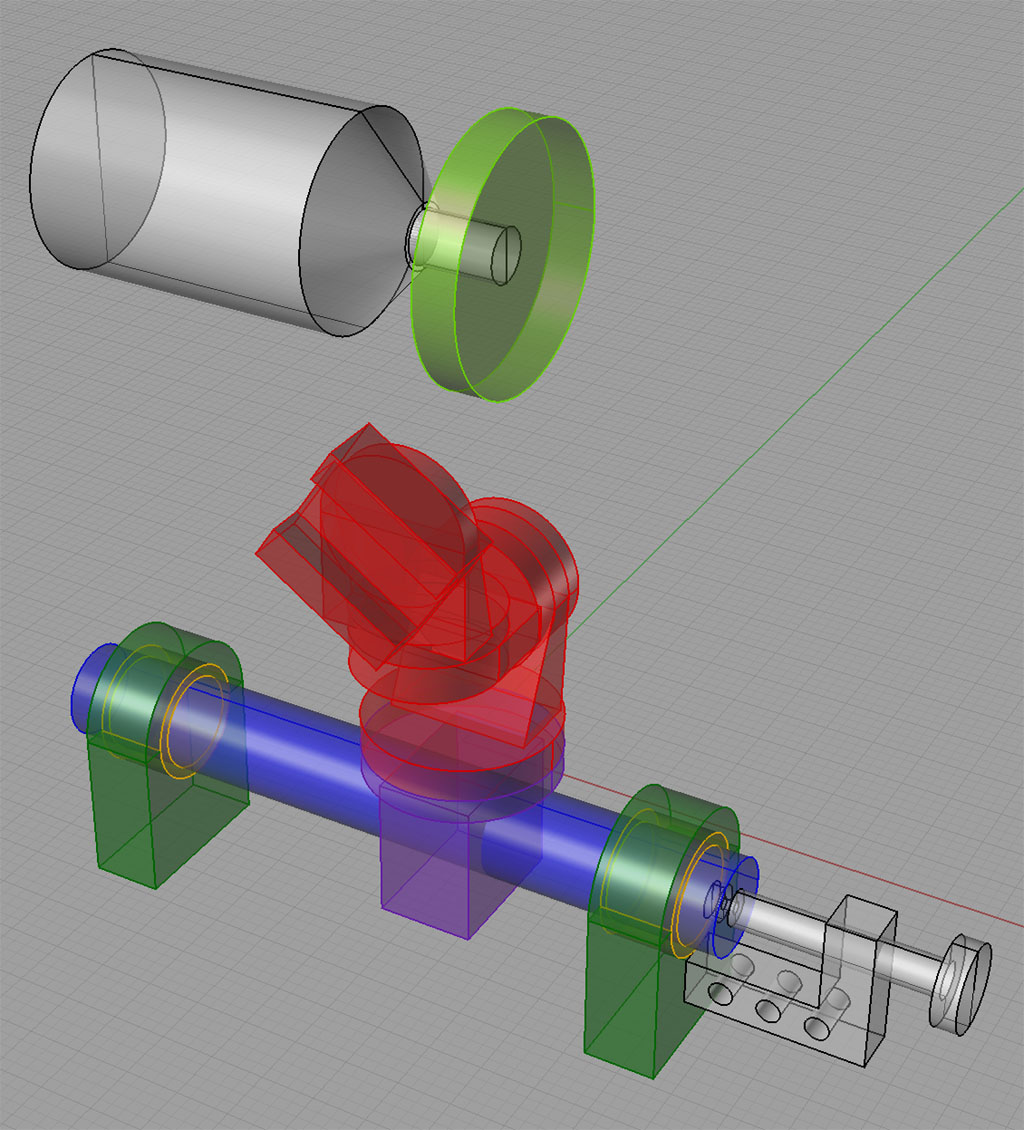
Bonelle T&C Grinder
Tool and Cutter grinders are always interesting amateur projects. They are real machines demanding of precision and potentially extremely useful. Here is Frank's rendition (he says it was his first "real" project):
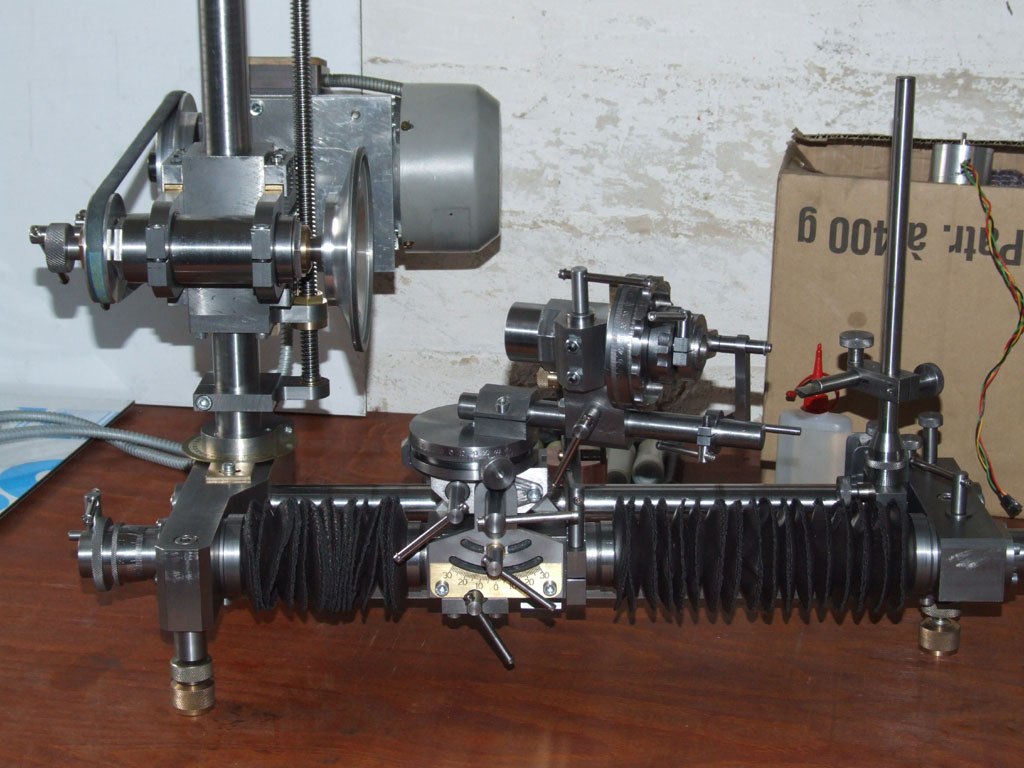
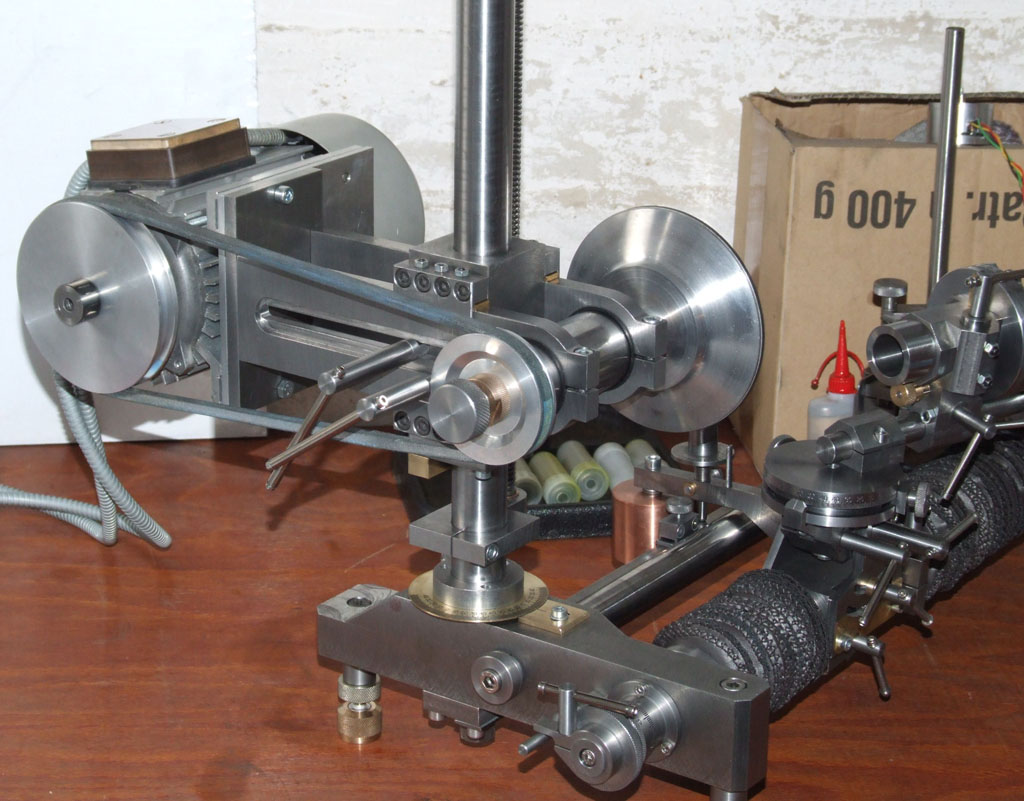
Frank also has an air bearing attachment for his T&C grinder that isn't shown here.
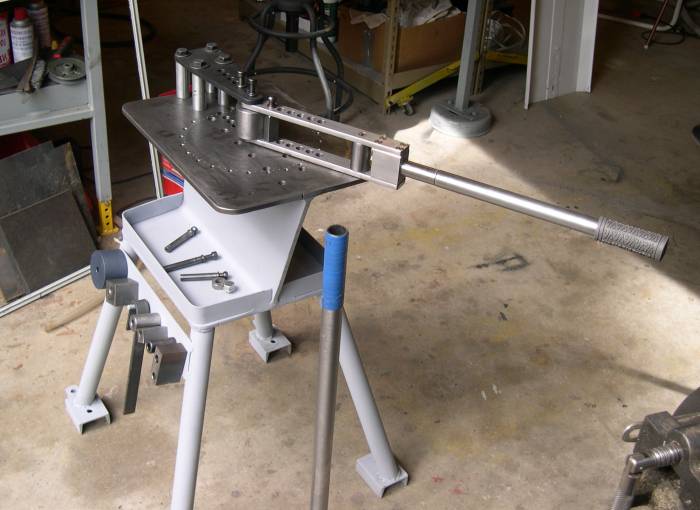
Evan's Tubing Bender
While on the subject of Evan, here is a tubing bender he made for his shop that's pretty nifty:
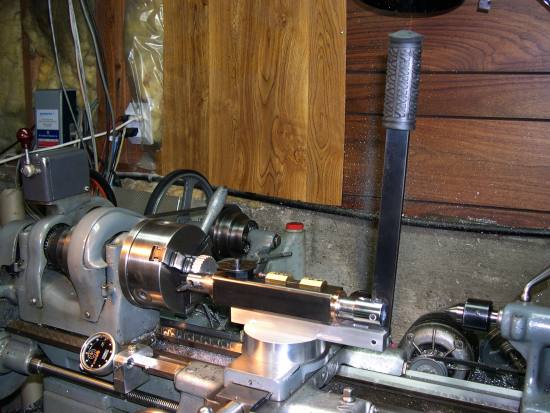
A Slotter for the Lathe from Canada
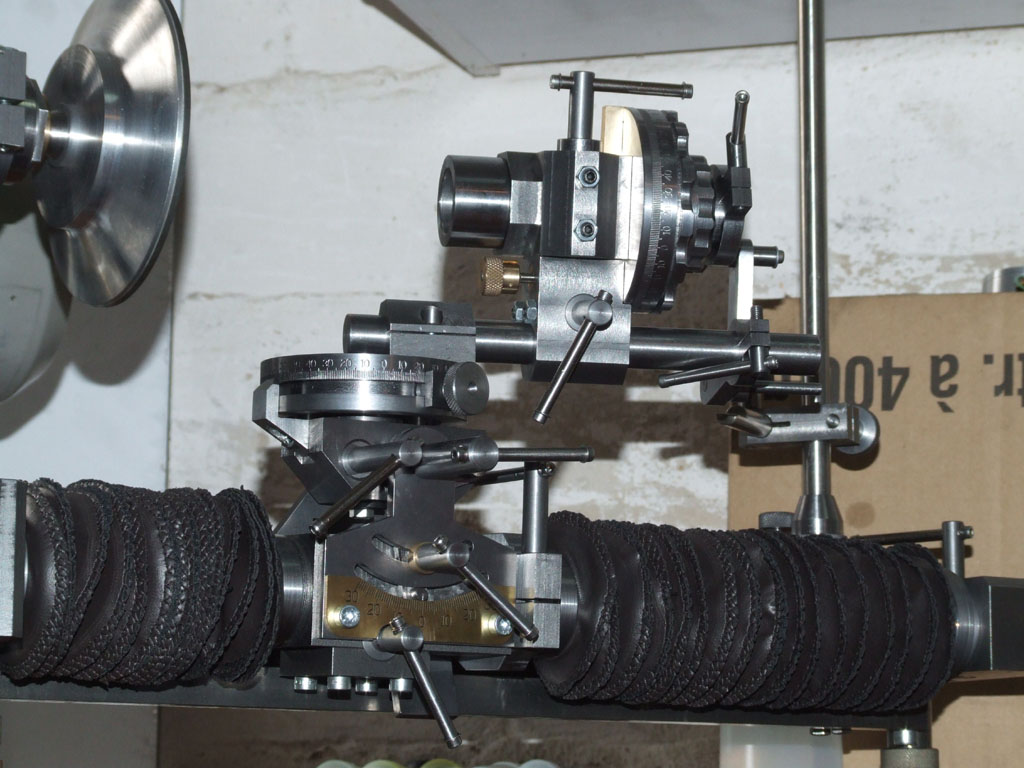
Here's a really gorgeous slotting attachment for the lathe made by Evan Williams:
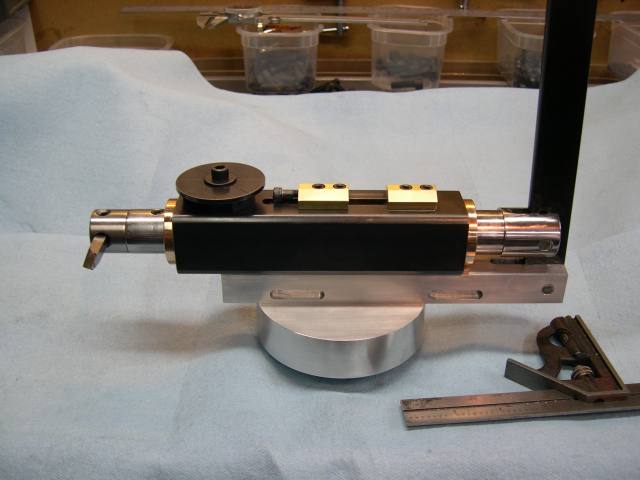

Lots to like about this slotter aside from the meticulous craftsmanship. For example, plenty of leverage on the handle, and the disc arangement on top gives different stop positions for the bottom of the stroke.
There are slotting heads available for mills:
Bridgeport Slotting head...
Why don't we ever see slotting attachments mounted to the side of a mill spindle? One similar to Evan's could be permanently mounted and available for use at any time without the need for setup on the lathe. Moreover, a small motor and you'd have your own slotting head equivalent.
My last thought for CNC'ers is that one could use the motion of an axis to drive the slotting action. I would not want the broaching force acting on my spindle bearings, but imagine being able to mount a tool on the side of the mill head nad use the Z axis servos to run the head up and down.
10/12/08
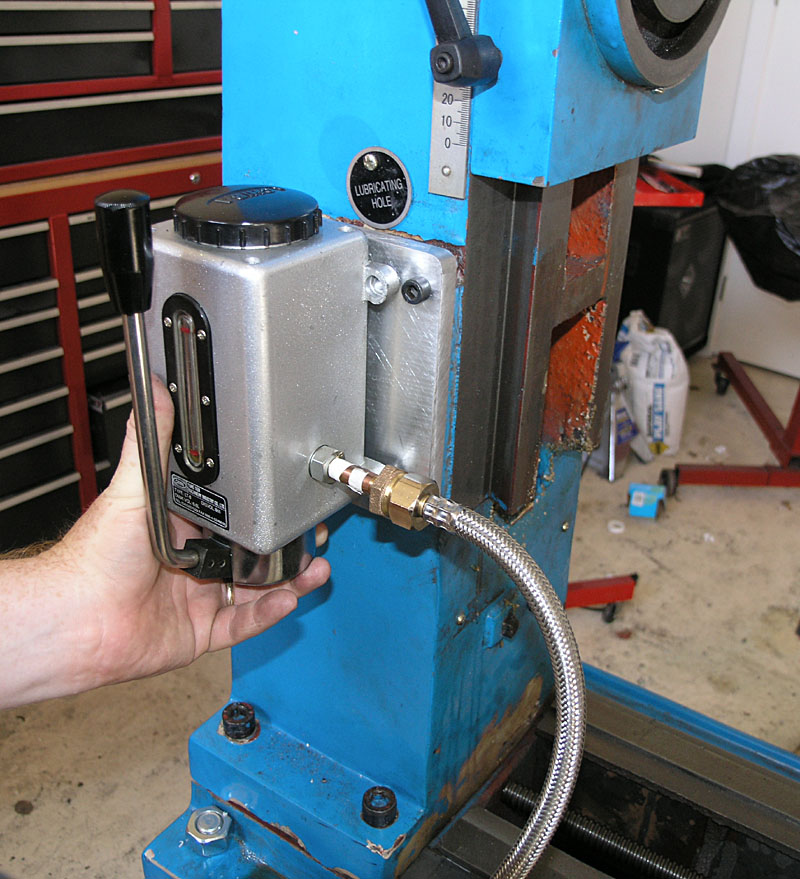
Finished the One Shot Oiling System on my IH Mill
I'm declaring the one shot oiling system project done today. There are some fine tuning items I may revisit, but for the most part, the system works extremely well and was worth the effort. Full details are on the one shot oiling system page. Here are a few "money shots" of the system:
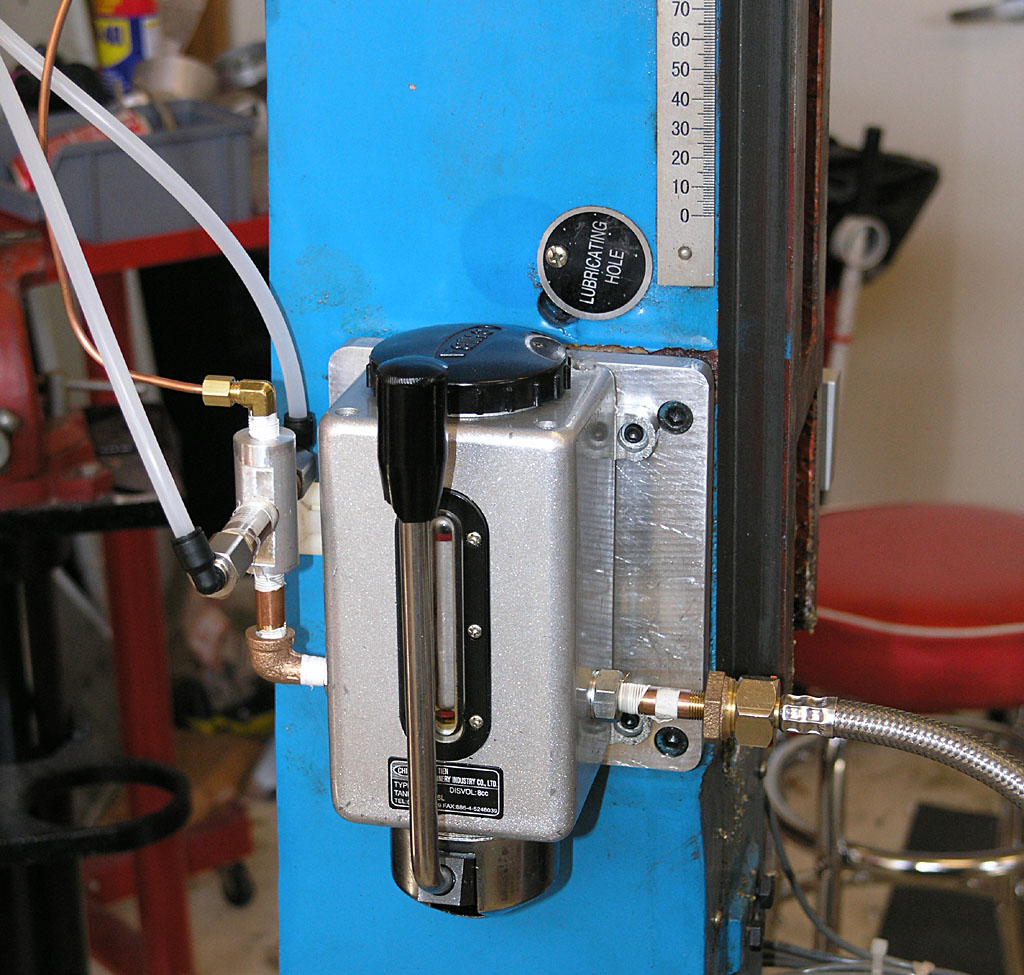
The pump mounted to the column...
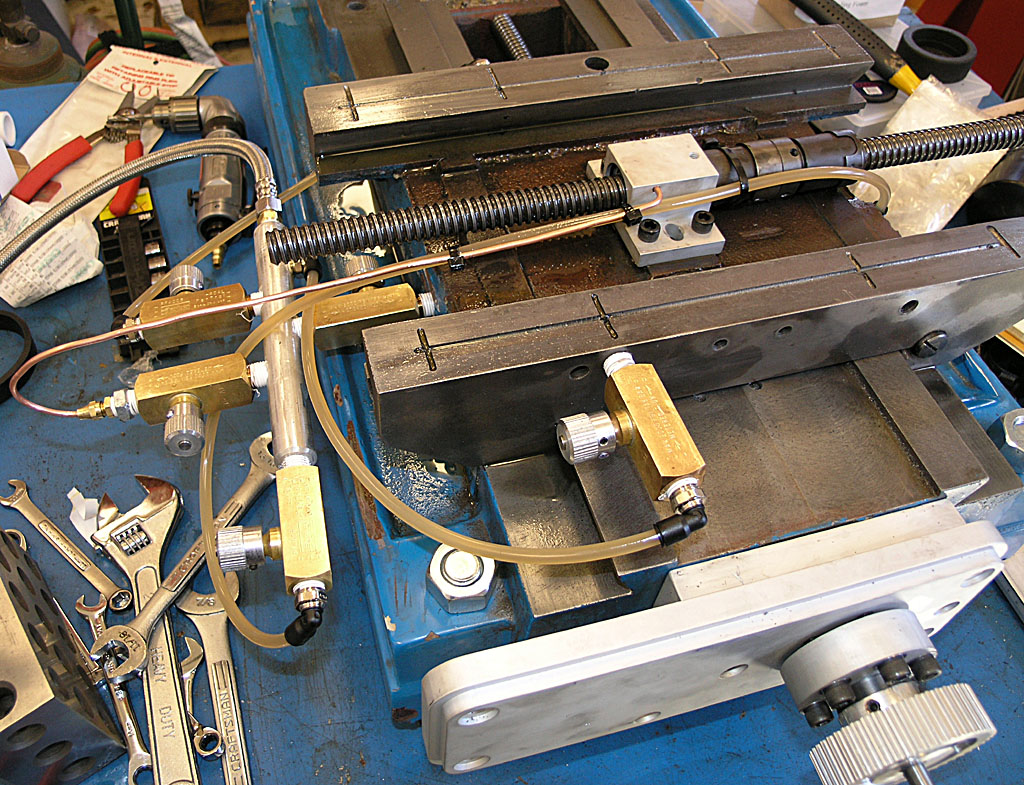
Shot of the saddle circuits...
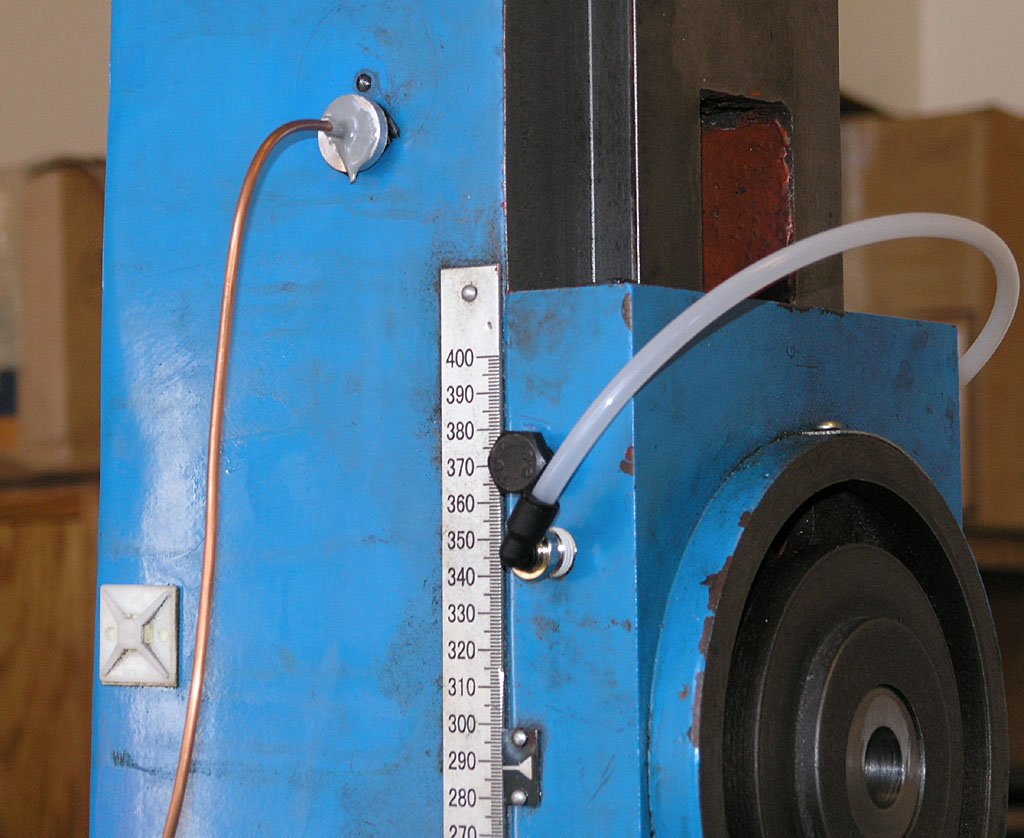
And the Z-axis circuits...

Oil grooves I cut into the ways. Convenient to own 2 IH mills!
10/11/08
Ordered a 1000 Watt DC Power Supply to Run the Servos Today
I ordered a PS-10N70 power supply from Antek today to power the servos on my mill. Here is a photo:
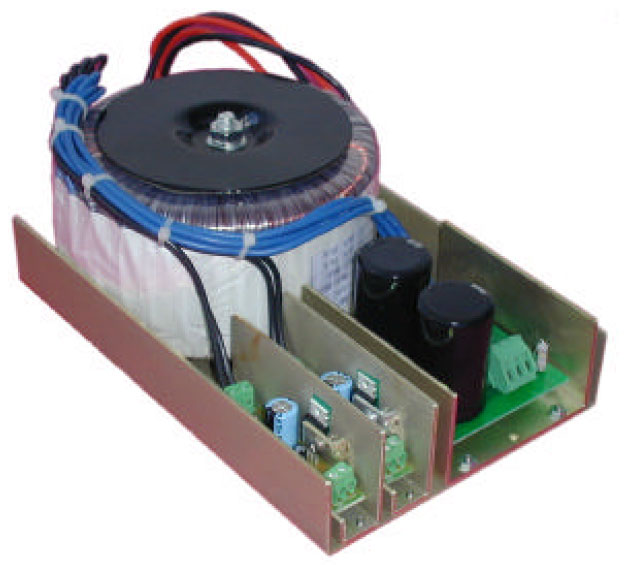
It was $150 + $10 shipping, which seems very reasonable. This is a 70V supply, which leaves a little margin for the 80V limit on the Geckodrives. Antek is run by a fellow named John Ango. I've ordered toroidal transformers from him before and he's a good guy to do business with. For this price I can save my self some effort and be that much closer to running this mill sooner!
Making Propellors with CNC
Someone asked me about making propellers with CNC, so I trolled around and found a few interesting articles. For example, here is a 5-axis router making pretty good sized wooden propellers that I thought was really cool:
5-Axis Router Making Propellers...
A high efficiency blade calculator for wind turbine blades is available from Warlock here. And Windstuff has a great tutorial on how to use the Warlock Blade Calculator in conjunction with Rhino3D to actually create a 3D model of an efficient wind turbine blade. Another possible source for aircraft propellers is the JC Propeller Design program. It isn't too expensive and outputs Solidworks or Rhino3D models to work from. And there are lots of good links in this CNCZone thread on making propellers.
There is a tremendous amount of interest in wind turbine propellers out there on the Internet as well.
10/05/08
Make Your Own Transfer Screws
Full details here on making a set of M8 transfer screws:

Easy to make, but indispensible!
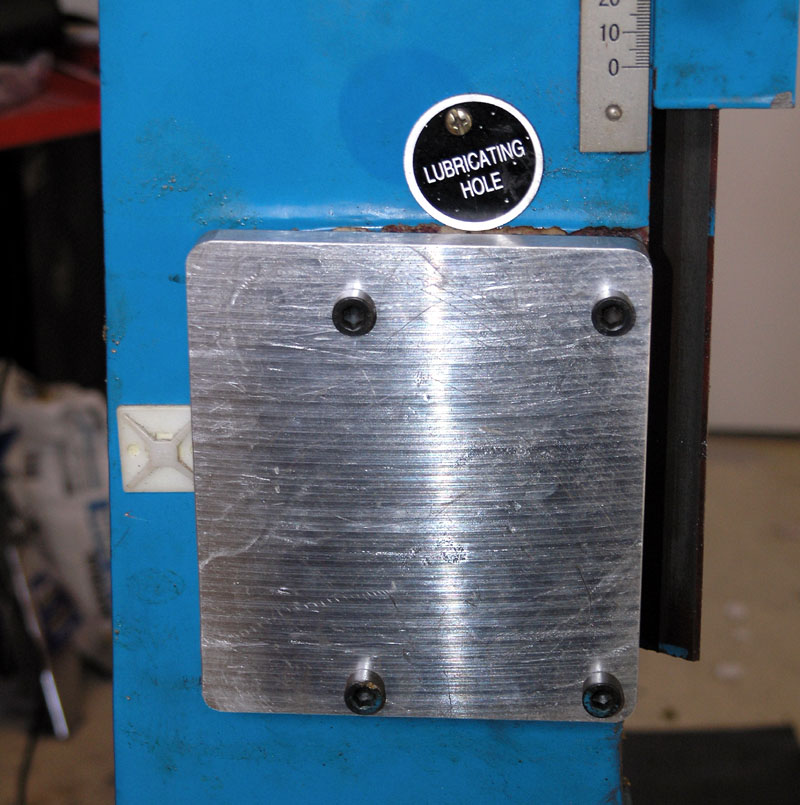
I needed a set to locate the holes in this plate for mounting the oil pump on my mill...
Not done yet, but it'll go something like this...
More Mill Progress: Column is on, New Timing Pulleys Ordered
Check it out (full details on the CNC Conversion page):
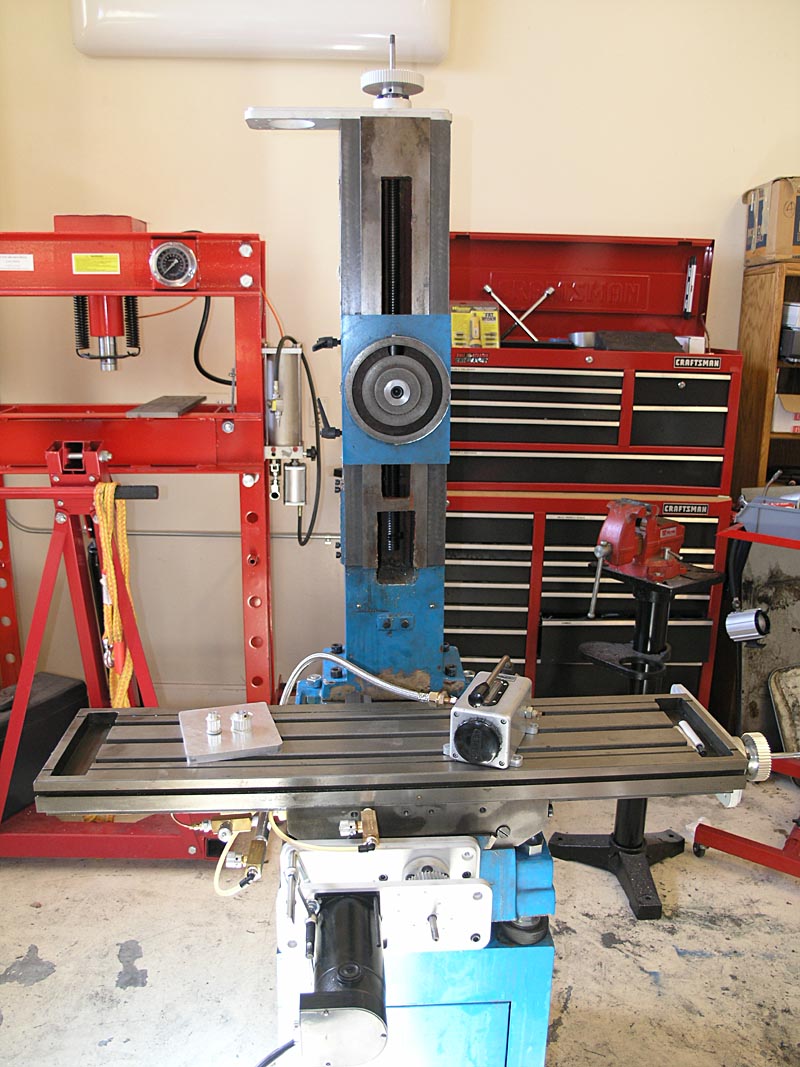
Starting to look like a mill again...
850 oz in HomeShopCNC servo looks beefy there....
10/02/08
Upcoming Sieg CNC Lathe
Some nifty photos of the upcoming Sieg CNC lathe:
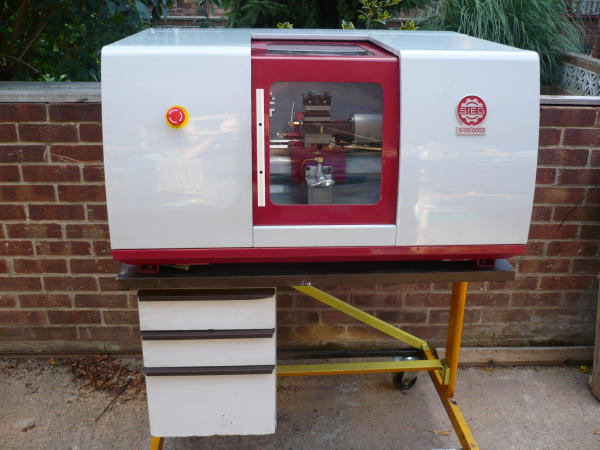
Nice compact package with a modern enclosure is really neat!
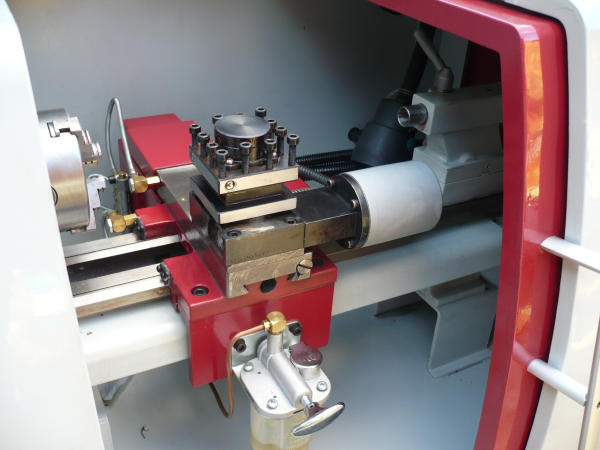
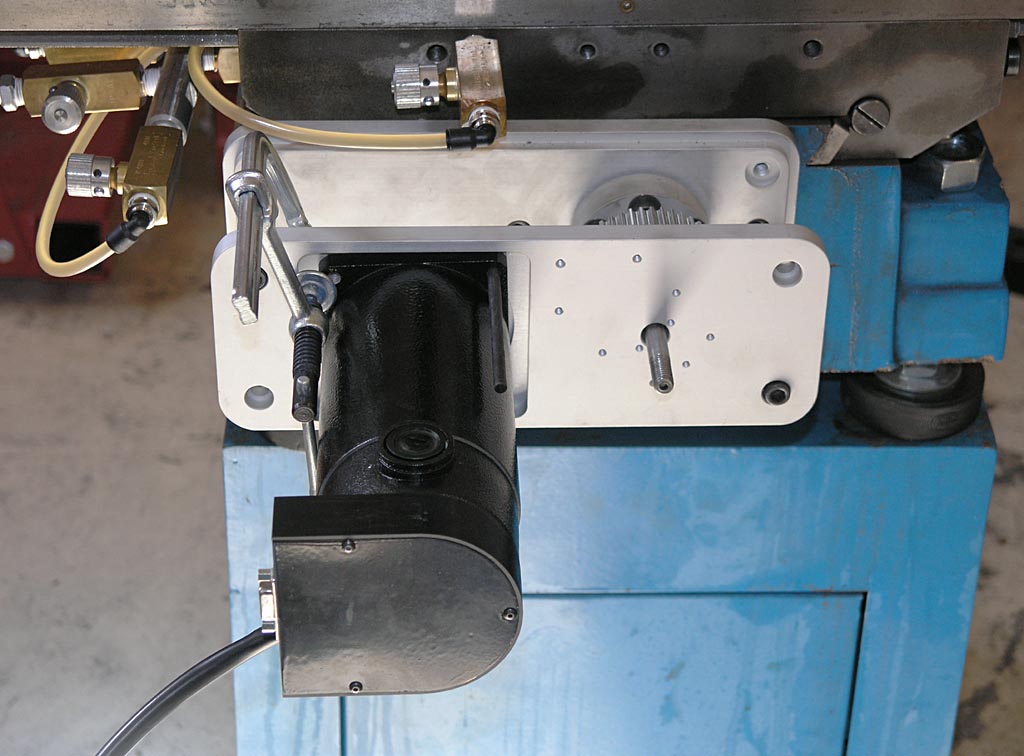
Single shot oiler and a 4-position turret. The turret stepper interferes with the tailstock it looks like...
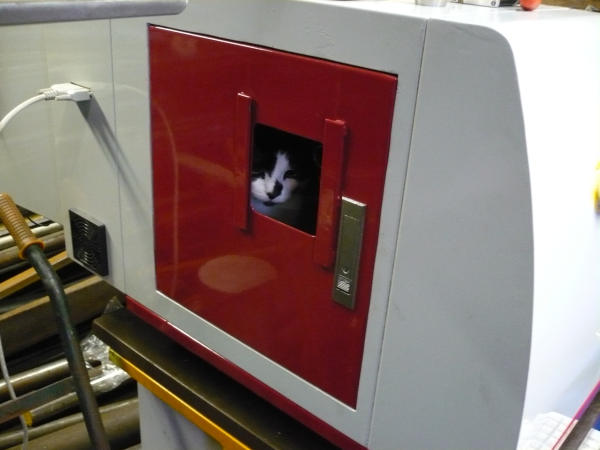
Spindle bore access and cat hidey hole!
They plan to sell these for education, but I can see a use for the hobbyist too! I'd love to get my Lathemaster 9x30 looking something like that.
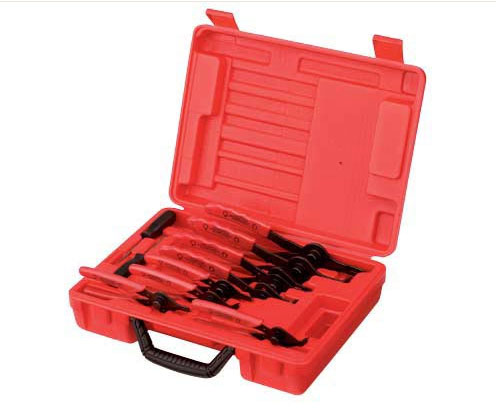
World's Best Snap Ring Pliers?
I always take note when someone starts a "best tool X" thread on one of the boards. This time around it was about snap ring pliers on Practical Machinist:
I have the usual type that has a single multi-purpose handle with interchangeable tips. I hadn't ever really thought much about them, they work pretty good, but they flex, and sometimes that ring goes clear across the shop if it slips off the points. Lately I have been installing some pretty large snap rings (over 1", which is large for me) on my CNC conversion for the mill. That flex is a lot worse with all the tension and so the article caught my eye.
I really liked the Northern Tool set that had individual snap ring pliers in each configuration, and no interchangeable points. I can see where a lot of the flex in my current pliers is because they're trying to be a snap ring Swiss Army Knife.
I took a look on the day I read about them, but didn't pull the trigger. This morning I got a notice they're having a small sale so I went back over and sure enough, the pliers were marked down a bit. The set is $49. It's not a screaming bargain, and it is a bit of an odd tool, but, I ordered a set because I've never regretted a nice tool, even if I use it rarely. I see more snap rings in my future making up my own items anyway, so I also ordered some assortments of snap rings, hair pins, o-rings, and roll pins.
Here's the set right here:
|
Do you want to be a better CNC'er in 37 Seconds? Get Better Tool Life, Surface Finish, and Material Removal Rates Fast. It's that easy. You can install and get results now.

|
||||||||||||||||||
| ||||||||||||||||||


