Tag That Photo User Guide - Part 2
Scanning, Import, and Face Tagging
Scanning and Importing
Initial Library Scan
When you first add folders to TTP, the scanning process begins automatically. You'll see progress indicators at the bottom right of the screen.

Scanning Timeline
The initial face detection scan is the most time-consuming part of setup. Scanning speed varies based on:
- Image Quality: Higher resolution images take longer
- Minimum Face Size Setting: Smaller sizes require more processing
- Storage Type: Local SSD (fastest) > Local HDD > Network drives > NAS over WiFi (slowest)
- System Performance: CPU speed and available RAM
Typical Performance: 2,500 to 3,500 images per hour on modern systems with SSD storage.
Note: It may take up to 20 seconds after selecting folders for the "facedetection" service to start scanning.
Recent performance upgrades include:
- Automatic scaling of face detection based on available CPU cores
- Non-blocking communication between the app and face detection service
- Faster full-library scans and faster Force Rescan operations on modern PCs
New Face Detection Scan Mode
You can now run scans in an Update Existing Faces Only mode:
- Updates previously detected faces without re-adding faces you intentionally deleted
- Useful when you want improved face data without rebuilding unknown-face noise
- Available in rescan workflows where scan mode options are shown

Importing from Other Applications
TTP can import face tags and metadata from other photo management applications.
Importing from Picasa
TTP will import face tags from Picasa if the tags are written into the images. To set up Picasa for compatibility:
- Configure Picasa to write all face tags directly into images
- Visit https://tagthatphoto.com/faqs/ for detailed setup instructions
- Add your Picasa library folders to TTP
- TTP will automatically read and import the face tags during scanning
Importing from Fotobounce
- Select your Fotobounce folder in TTP
- TTP will export the Fotobounce library to an intermediate file
- Metadata is then imported into TTP
Note: Only names and face information are imported from Fotobounce.
Importing from Microsoft Photo Gallery
If you've enabled metadata writing in MS Photo Gallery, TTP will automatically read those face tags during the image scan.
Required MS Photo Gallery Settings:
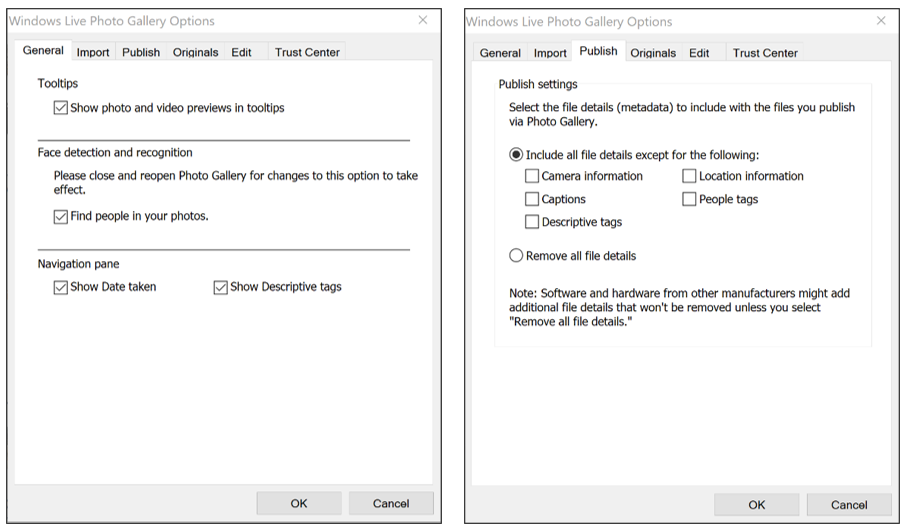
- Enable "Store tags in files"
- Enable "Make tags visible to Windows Explorer"
Face Tagging Workflow
Understanding Face Recognition
TTP uses advanced face recognition technology powered by deep machine learning to match known faces with unknown faces.
How It Works
- Face Templates: Each detected face is converted into a digital signature (face template)
- Likeness Scoring: When two templates are compared, a similarity score is calculated
- Suggestion Threshold: If the score exceeds your configured threshold, it becomes a suggestion
- Clustering: Unknown faces with similar templates are grouped into clusters
- Progressive Learning: As you tag more faces, TTP gets better at making accurate suggestions
Favorite Faces System
TTP limits the pool of face templates used for suggestions to improve speed and accuracy:
- Initially, TTP auto-selects up to 50 high-quality faces per person as "favorites"
- You can manually adjust favorites, adding up to 50 more (100 maximum per person)
- Only favorite faces are used to generate suggestions
- This focuses recognition on the best quality face examples
Best Practice: Periodically review favorite faces for each person. Poor quality favorites lead to poor suggestions.
The Three Face Views
TTP organizes faces into three main tabs based on their status:
1. People Tab
Shows all identified people in your library. Each person displays: - Profile thumbnail (representative face) - Person's name - Number of tagged faces - Suggestion indicator icon (when pending suggestions exist)
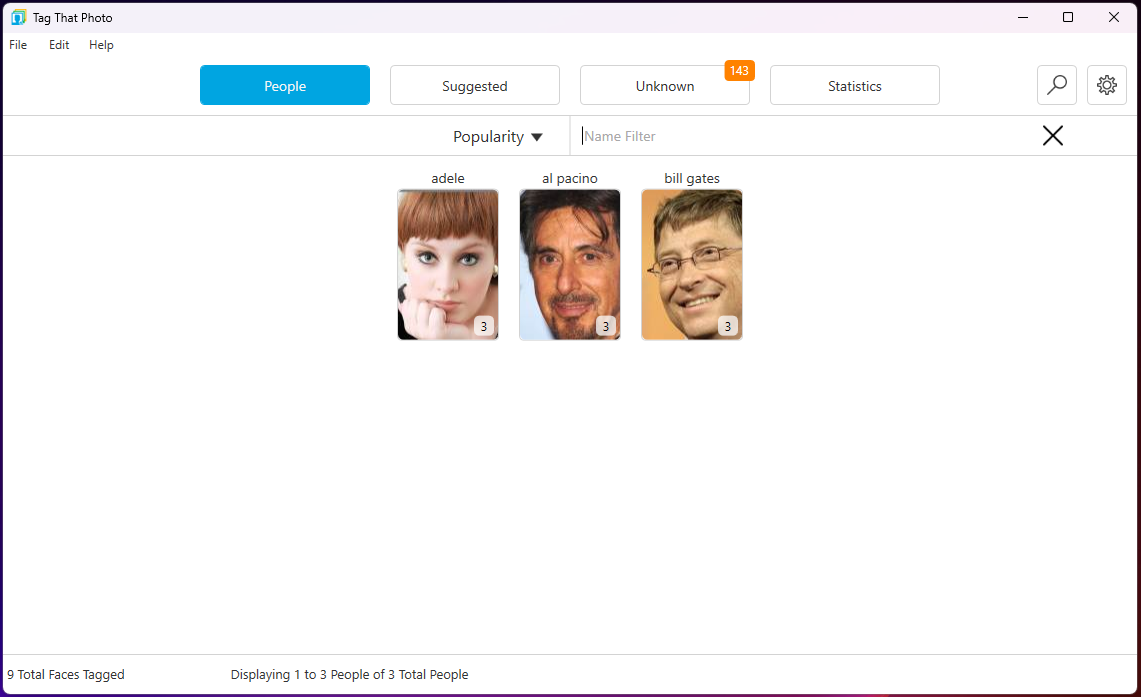
New in 3.4: Visual indicators now appear on thumbnails when that person has pending suggestions, making it easy to see who needs attention.
Sorting Options: - Alphabetically by name - By popularity (most faces) - Filter by typing part of a name
Quick Access to Suggestions: - Press CTRL-T with a person selected, OR - Right-click and select "View Suggestions"
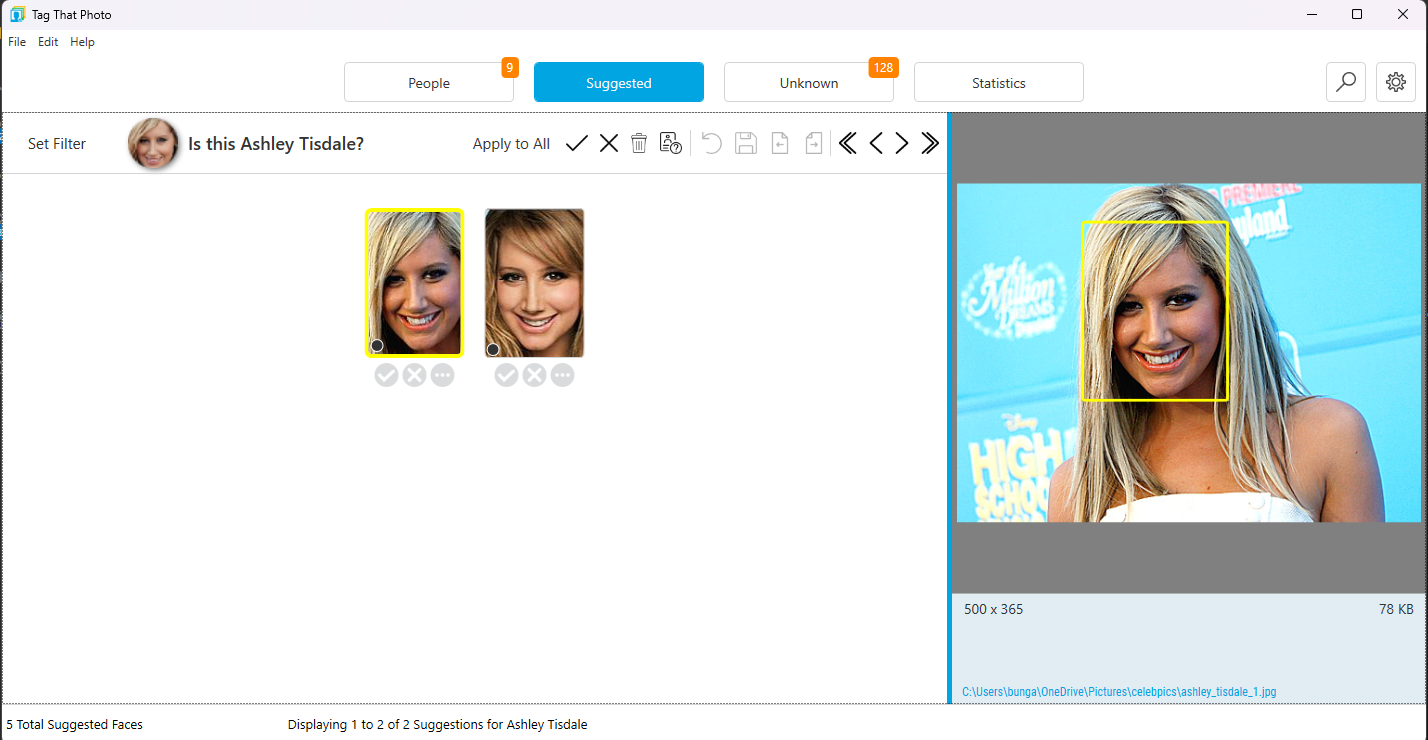
2. Suggested Tab
Shows faces that TTP thinks it recognizes based on similarity to known people.
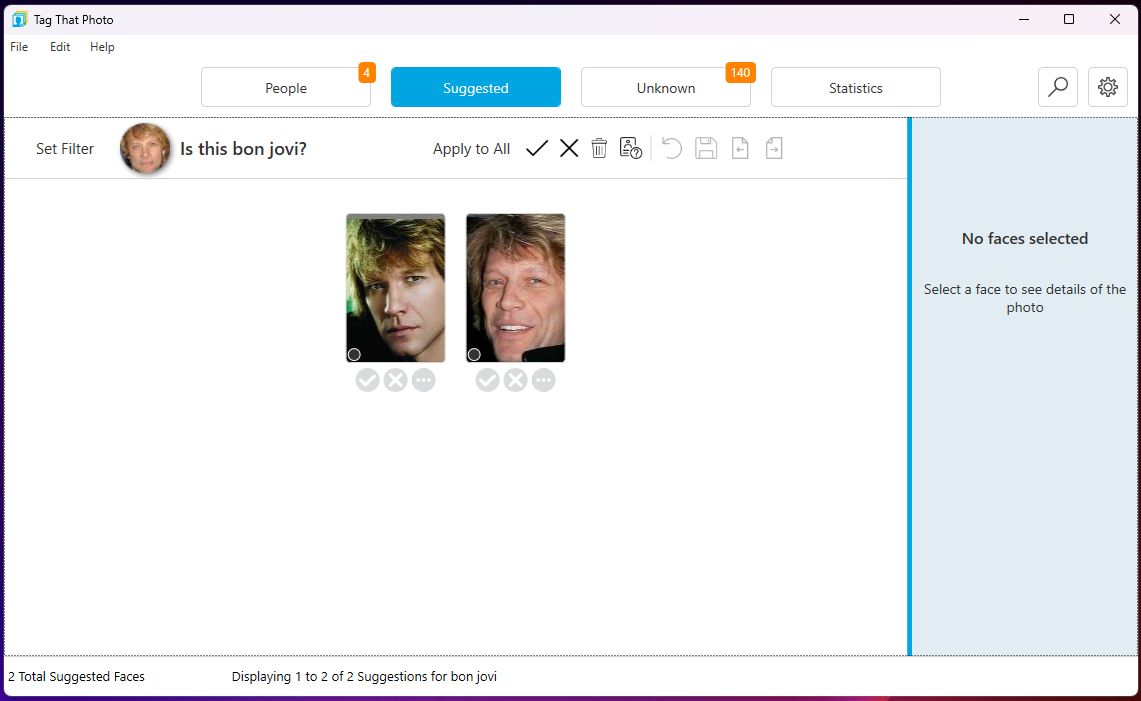
The suggested name appears at the top left. Your job is to: - Confirm correct suggestions (CTRL-K or click checkmark) - Reject incorrect suggestions (CTRL-X or click X) - Delete faces you don't want to tag (DEL) - Rename if the face is someone else (CTRL-N)
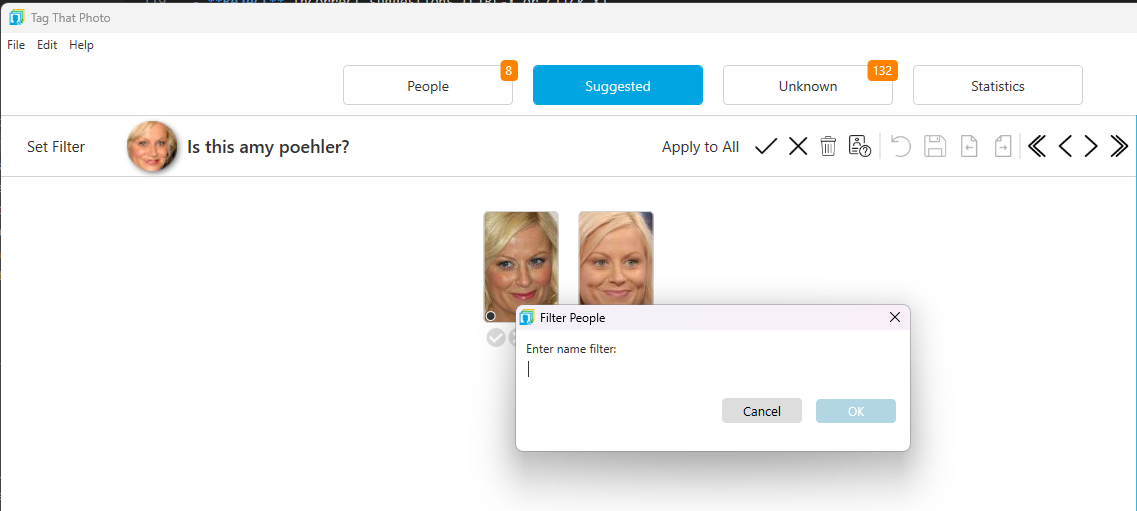
New in 3.4 - Filter Suggestions:
When you have many people with suggestions, use the filter to focus:
- Click Set Filter button on Suggestions tab
- Type part of a name (e.g., "Smith" or "John")
- Only matching suggestions display
- Process those suggestions
- Click Clear Filter to see all suggestions again
New in 3.4 - Mini-Collage Reference:
Click on the suggested person's name to see a mini-collage of up to four reference faces:
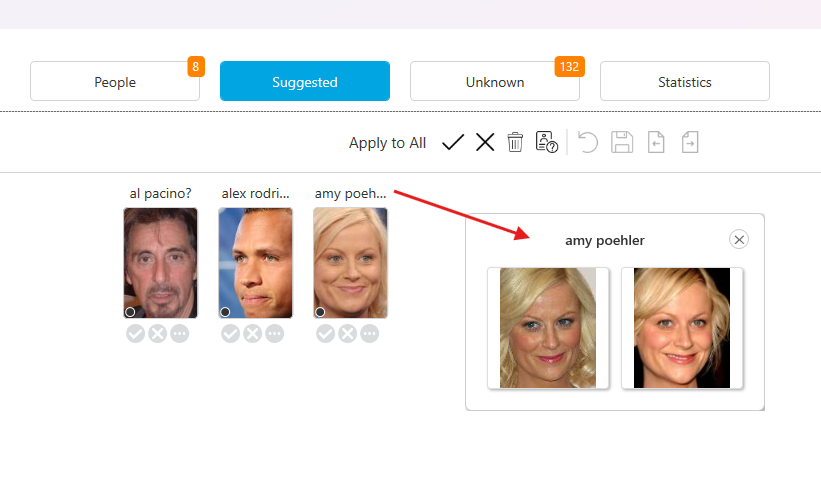
This visual reference helps you confirm identity with more confidence, especially when: - People have similar features - Photo quality varies significantly - You're working with childhood photos where appearance changes over time
New in 3.4 - Enhanced Navigation:
- << (Go to First): Jumps to person with most suggestions
- >> (Go to Last): Jumps to person with fewest suggestions

3. Unknown Tab
Shows faces that TTP doesn't recognize yet, organized into clusters of similar-looking faces.
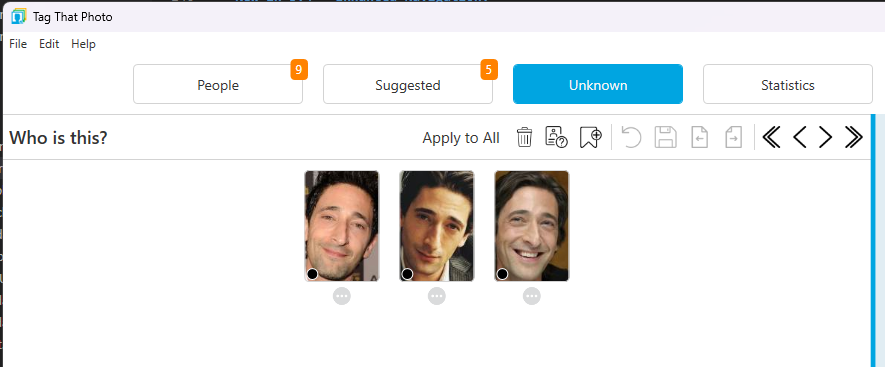
Organization: - Largest clusters appear first - Single-face clusters appear after multi-face clusters - Navigate between clusters with arrow keys or buttons
New in 3.4 - Enhanced Navigation:
- << (Go to First): Jumps to largest cluster
- >> (Go to Last): Jumps to smallest clusters
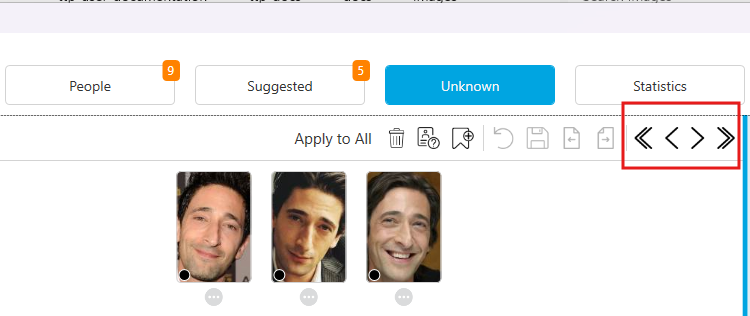
Use these shortcuts when you have thousands of unknowns and want to efficiently process the largest groups first.
Color-Coded Face Indicators
Each face thumbnail includes a small colored dot indicating its origin:
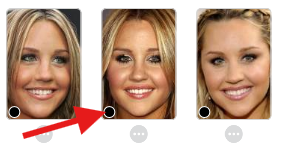
- Black Dot: Face detected by TTP only, no previous tag existed
- Orange Dot: No matching metadata face tag exists
- Red Dot: Face created manually in TTP
- Purple Dot: Metadata tag exists but no matching TTP face found (often indicates poor quality face)
Face Tagging Process
Starting with Unknown Faces
Begin your tagging journey in the Unknown tab.
Step 1: Delete Unwanted Faces
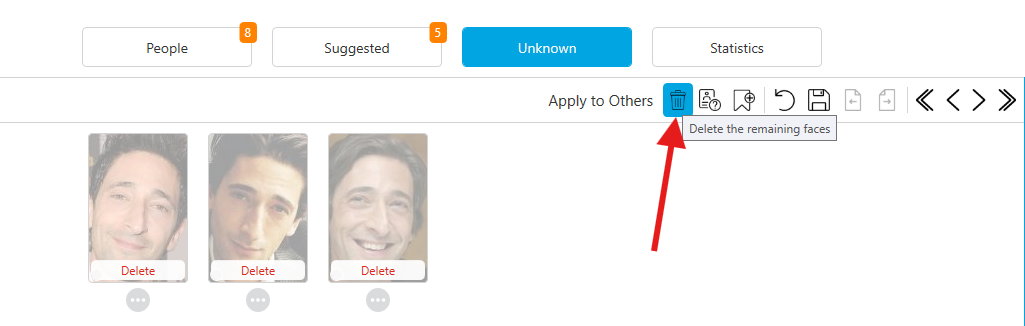
Delete faces you: - Don't recognize - Don't wish to tag - Know are false positives
Important: Deleting a face removes it from the database but does NOT delete the photo. If you accidentally delete a face, open the photo in Photo Viewer and select "View > Show Deleted Faces" to restore it.
Step 2: Name Faces in Clusters
Clusters make tagging efficient by grouping similar faces together.

To name faces:
- Individual Face: Click the dot menu below the thumbnail, or press CTRL-N
- Multiple Faces: Select multiple thumbnails, then press CTRL-N or click menu
The Person Selector appears at the bottom showing: - Left Column: Recently tagged people (quick access) - Right Column: Most popular people (your most-tagged individuals) - Text Field: Type to search or create new name
Typing Tips: - Type in any order: "smith m" or "mary s" both match "Mary Smith" - Partial matches appear in dropdown - Select from dropdown or press Enter to create new person
Step 3: Preview and Confirm
Click any face thumbnail to see a preview of the full image in the right pane.
The preview display can be resized: - Drag the border left or right - Expand to approximately ⅓ of screen size - Setting persists across sessions - Works in People, Suggestions, and Unknown views
Step 4: Review and Save
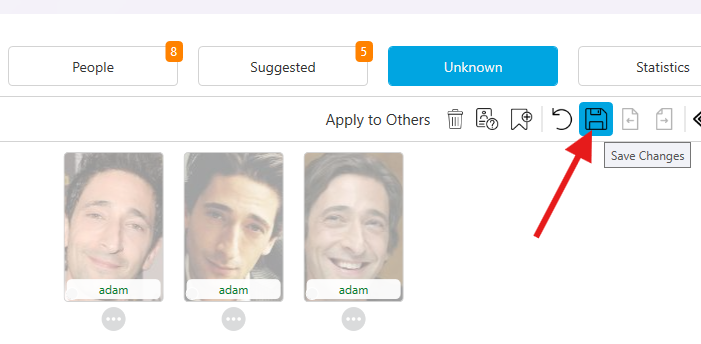
Before saving, you can: - Reset (↺): Clear all selections on current page - Change names: Click dot menu again to modify - Delete: Remove unwanted selections
Press Save, CTRL-S, or Enter to apply your tagging.
Processing Suggestions
As you tag Unknown faces, TTP generates Suggestions based on similarity to your tagged people. All suggestions are shown under the Suggestion tab. An "S" is displayed on each person thumbnail under the People tab if they have outstanding suggestions.
Best Practice: Process suggestions promptly. Each confirmed suggestion provides better training data for future suggestions.
Options for Each Suggestion:
- Confirm (CTRL-K or ✓): Face is correctly identified
- Reject (CTRL-X or ✗): Face is not this person; TTP won't suggest it again for them
- Delete (DEL): Remove face entirely from database
- Rename (CTRL-N): Face is someone else; assign correct name
- Save for Later: Not ready to decide (new in 3.4)
Tip: If you notice consistently poor suggestions for a person, review their favorite faces. Blurry, profile, or poor-quality favorites lead to bad suggestions. Edit favorites by viewing that person's faces and toggling the star icons. Only thumbnails with the star are used for recognition purposes.
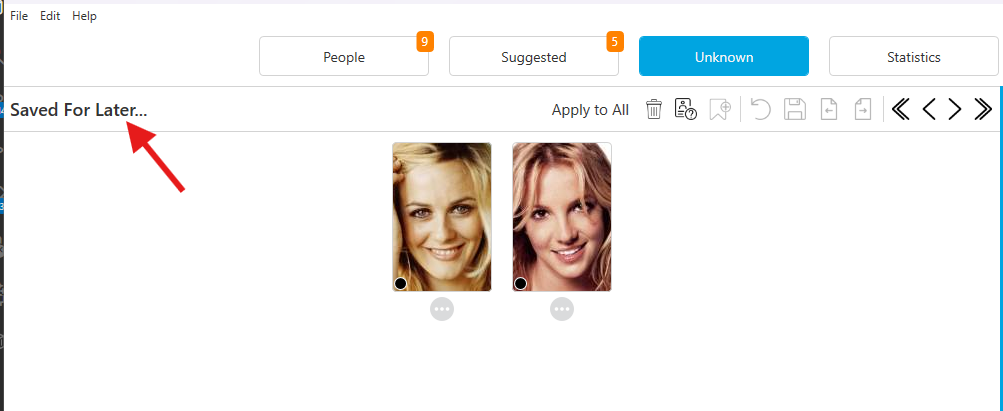
Saved for Later
The "Saved for Later" feature helps manage large numbers of faces when detailed review becomes tedious.
Using Saved for Later
For Unknown Faces:
- When scrolling through small clusters becomes tedious
- Select Edit > Save All (Unknowns) for Later from menu
- Faces move to "Saved for Later" section at end of Unknown tab
- Scroll through full pages of thumbnails to quickly identify friends/family
- When ready, Delete All Saved for Later to remove remaining faces
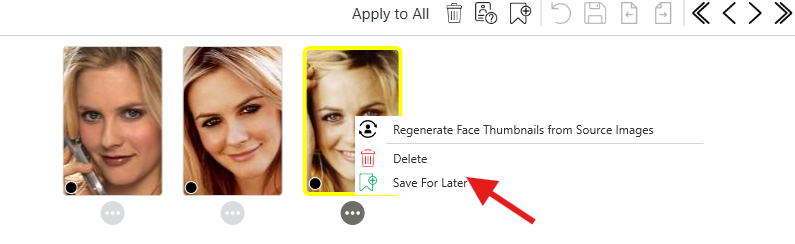
For Individual Faces (Unknown or Suggested):
- Right-click on any face thumbnail
- Select Save for Later
- Face moves to "Saved for Later" section
For Groups of Faces:
- View a page of Unknown faces
- Click the Save for Later icon in the top menu (or use CTRL-L)
- All faces on current page move to "Saved for Later" section
![]()
Note: Once deleted from "Saved for Later," those faces won't be available for future suggestions.
Date-Ordered Face Viewing
When viewing all faces for a specific person, they now display in image date order by default (previously sorted by date scanned).
Benefits
- See how a person has changed over time
- Easily spot duplicate or similar photos
- Better context for selecting favorite faces
- More intuitive organization
Sort Options
Toggle between two sorting modes using the sort pull-down menu.
- Date Order (Default): Faces sorted by photo date, oldest to newest
- Favorites: Favorite faces displayed first
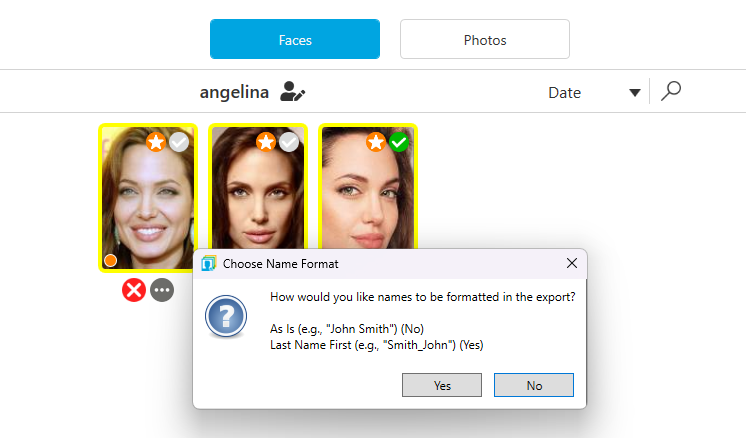
Exporting Faces Chronologically
When you export face thumbnails for a person, they now export in image date order:
- Select one or more people
- Right-click and select Export Face Thumbnails
- Choose export folder (must be outside TTP monitored folders)
- Thumbnails export in chronological order
Creative Uses: - Create time-lapse GIFs showing person aging - Build photo collages in chronological order - Generate birthday slideshow sequences
Keyboard Shortcuts for Tagging
In Thumbnails View (People, Suggested, Unknown)
| Shortcut | Action |
|---|---|
| CTRL-K | Confirm/Accept selected faces (or all if none selected) |
| CTRL-X | Reject selected faces (or all if none selected) |
| CTRL-N | Open Person Selector to name selected faces |
| CTRL-D or CTRL-DEL | Delete selected faces |
| CTRL-T | View suggestions for selected person (People view only) |
| CTRL-L | Save marked faces for Later |
| CTRL-Z | Undo last action |
| CTRL-S or Enter | Save changes |
| CTRL-Left/Right Arrow | Navigate between thumbnails |
| ESC | Reset selections |
Efficient Workflows
Workflow 1: Unknown Cluster (10 faces, 2 unwanted) 1. Delete the 2 unwanted faces (DEL) 2. Click menu icon at top right 3. Select "Name all remaining faces" 4. Enter person's name 5. Press Enter to save
This is faster than individually selecting 8 faces with your mouse.
Workflow 2: Mixed Page of Singles 1. Quickly scan thumbnails 2. Name any recognized friends/family (CTRL-N on each) 3. Click trash icon to delete remaining unknowns 4. Save (CTRL-S)
Workflow 3: Suggestion Review 1. Press CTRL-K to confirm all correct suggestions 2. Press CTRL-X to reject any incorrect ones 3. Press CTRL-N on misidentified faces to rename 4. Save (CTRL-S)
End of Part 2: Scanning & Face Tagging
Continue to Part 3: Working with People...