Tag That Photo User Guide
April 2026 Edition
Introduction to Tag That Photo
Tag That Photo (TTP) is designed primarily for the family photo archivist. It is essentially a "power face tagger and organizer" for managing large quantities of digital photos. The typical TTP user is concerned about the following factors:
- Control and privacy of their personal data/images
- Fast and accurate tagging
- Powerful searching with people being the primary index
- Ownership and retention of their tagging efforts (not locked into a proprietary platform or database)
What Tag That Photo Does
Tag That Photo excels at: - Automatically detecting faces in your photos - Using advanced face recognition to suggest names for unknown faces - Organizing photos by people, dates, keywords, and locations - Writing face tags and metadata directly into your images using industry standards - Providing powerful search capabilities to find photos in seconds
What Tag That Photo Does NOT Do
Tag That Photo is not designed to: - Edit photos (use dedicated photo editors for this) - Share photos on social networks - Show ads or sell your data to third parties
System Requirements
At present, Tag That Photo is a Windows 64-bit application designed to take advantage of advances in memory size and disk I/O performance. TTP runs on 64-bit versions of Windows 7, 8, 10, and 11.
Note: We do not have an Apple macOS version and while we have received a few requests, we don't have any plans in the near future to develop one.
Getting Started
Installation
To install Tag That Photo:
- Download the installation program by registering for a free trial on the Tag That Photo website at www.tagthatphoto.com
- The latest version is always available at: https://tus-api.tagthatphoto.services/tus/latestClientInstaller
- Upon registering, you will receive an email with installation instructions
Windows Security Notice: Windows may caution that the installation program is "unknown." We assure you that the Tag That Photo application is properly signed and is likely being flagged because it is relatively new. You can submit the install program to sites like VirusTotal.com for peace of mind that there are no security issues related to TTP.
Installer Improvements (April 2026)
- Install, upgrade, and uninstall workflows now complete without reboot prompts under normal conditions
- Installer shuts down Tag That Photo, face services, and ExifTool automatically before replacing files
- Windows Explorer integration refreshes automatically so right-click menu updates appear immediately
- Upgrade cleanup is more reliable when older background processes were left running
First Launch Setup
For New Subscribers
If it is your first time running TTP, you'll see the Settings Screen first and will be prompted to select folders to add to your library. TTP will scan any digital images (PNG, JPEG, TIFF, RAW, HEIC) in those folders and add the images to your TTP library.
For Existing Subscribers
You will see a splash screen as the various system services are started. When this disappears, you will be presented with the People view.
Background Services
Your virus scanner may prompt you to allow the "Face Recognition" and "Face Detection" programs to use a network connection. These services run in the background and communicate with the Tag That Photo main program using TCP/IP (internet protocol).
A TTP tray program allows you to open the main program (if it has been minimized) or close the program and background services. You can also close everything via the last File menu option from within the program.
![]()
Important: Prior to running a computer backup, be sure to close the background services. This ensures that the TTP database files are closed properly. You can find the integrated backup option at the bottom of the Settings panel.
Supported Image Formats
TTP supports the following image formats:
- PNG - Supported by default
- JPEG/JPG - Supported by default
- TIFF - Supported by default
- RAW - Native digital format from cameras (Nikon, Sony, Canon, etc.). Requires Microsoft codecs. See full list at https://www.libraw.org/supported-cameras
- HEIC/HEIF - Apple's high-efficiency image format. Requires Microsoft codecs.
Setting Up RAW and HEIC Support
TTP uses Microsoft-supplied image drivers to support viewing and scanning HEIC and RAW images. To test whether you have the appropriate drivers:
- From the Help menu, select Diagnostics
- Select Check RAW & HEIC Image Support
- TTP will attempt to display a HEIC and a RAW formatted image
- If you can view the images, you're all set
- If you cannot view the images, you need to install the necessary drivers
Installing Required Codecs
These can be found at the Microsoft Store (the base drivers are free):
For RAW Images: - Install "Raw Image Extension" from Microsoft Store
For HEIC/HEIF Images: - Install "HEIF Image Extensions" from Microsoft Store - You may also need "HEVC Video Extensions" (approximately $1 USD) depending on your Windows version
Additional Files Created for Sidecar-Backed Formats
When working with RAW, HEIC, PNG, and TIFF images (and JPEG when Non-Embedded mode is enabled), TTP may create supporting files:
- XMP Metadata File (Sidecar)
- Has the same name as the original image, with .xmp extension
- Typically less than 20KB in size
- Contains all metadata (face tags, keywords, GPS, etc.)
-
Critical: When moving sidecar-backed images, always copy the XMP file to preserve metadata
-
JPG Thumbnail
- 200KB to 300KB per image
- Hidden file used for display purposes
- Will be recreated if missing when image is scanned
- Not as critical as XMP metadata
Initial Configuration
Settings Overview
Access the Settings by clicking the gear icon at the top right of the main window.
![]()
This is your central location for configuring how TTP manages your photo library.
Adding Your Photo Folders
During installation, TTP automatically adds a default folder called "PhotoAlbums" to your Pictures folder. This is useful for testing, but you'll want to add your actual photo folders.
To add folders:
- Click the Add Folders button
- Navigate to the folder containing your photos
- Select the folder
- Click OK
TTP will begin scanning the folder for images. Folders can be selected from any location visible to Windows Explorer, including: - Local drives - Network drives (must be mapped to a drive letter like E:, G:, etc.) - Cloud storage (Google Drive, Dropbox, Box.net, OneDrive, etc.)
Important Cloud Storage Note: Configure your cloud storage provider to always store all images locally on your hard drive. Most cloud providers offer smart storage features that only download files on-demand - this is NOT compatible with TTP and will cause scanning issues.
Tip: If you're doing extensive tagging that will sync to cloud storage, consider temporarily turning off sync during your tagging session, then re-enabling it when finished. This reduces bandwidth usage and improves performance.
Configuring Interface Preferences
Dark Mode
TTP offers both light and dark interface themes. The dark mode reduces eye strain in low-light conditions and provides a modern aesthetic.
To toggle dark mode: 1. Go to Settings 2. Find the Dark Mode toggle switch 3. Click to enable or disable

Thumbnail Size
Adjust the size of both photo and face thumbnails simultaneously. Larger thumbnails make faces easier to identify, especially on high-resolution displays, but show fewer items per screen.

Folder Monitoring Options
Live Folder Monitoring
This feature controls which folders are continuously monitored for changes by TTP. You may want to disable monitoring for folders where other photo programs create temporary files during their operations.
Example: If you use another program to batch-add GPS coordinates, that program might create temporary files, add data, delete originals, and rename temps. If TTP is monitoring that folder, it will attempt to scan each temporary file, wasting time and resources.
Recommendation: Toggle monitoring off before using other programs for batch operations, then manually trigger a scan when finished using the TTP Windows Explorer menu.
Scheduled Library Scan
For each monitored folder, TTP will scan on a recurring basis (typically every 7 days) for changes. Large libraries can take time to scan, so you can exclude specific folders from automatic scanning if needed.
You can always manually initiate a folder scan from the TTP right-click menu in Windows Explorer.
Library Rules
Library Rules give you fine-grained control over what gets scanned in each folder.
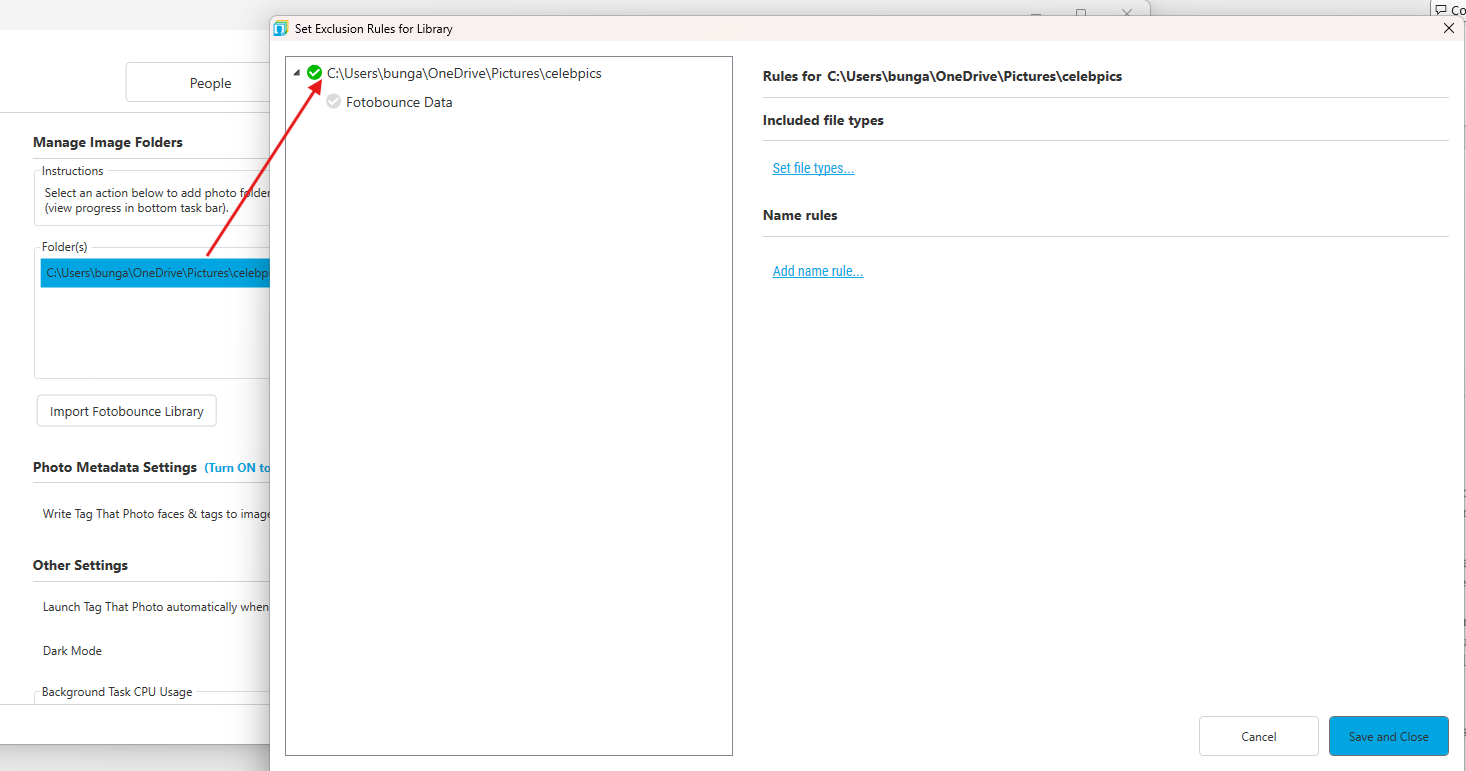
To create or edit rules:
- Select a specific folder in your Library (click on the row)
- Click the Set Library Rules button
- The Library Rules window appears
The window shows: - Left side: Folders contained within the root library folder - Right side: Specific rules that have been set
Types of Rules
- Included File Types
- JPEG, TIFF, PNG, RAW, HEIC
- All selected by default
-
Uncheck to exclude specific formats
-
Excluded Files or Folders
- Create exclusion rules by name
- Use wildcards (*) for flexible matching
- Example: "thumb" excludes any folder with "thumb" in the name
- Example: "temp_*" excludes files starting with "temp_"
- Control scope: entire folder tree or just specific levels
Example Use Case: To exclude thumbnail folders and temporary files: - Add rule: Exclude folders containing "thumbnails" - Add rule: Exclude files matching "~*" (temporary file prefix)
Temporary File Handling
Various programs create temporary files during metadata modifications. TTP attempts to maintain the connection between original, temp, and modified files, but this requires processing overhead.
Best Practices: 1. Turn off live monitoring if regularly editing images outside TTP 2. Use exclusion rules for known temp file patterns 3. Manually trigger scans after batch operations complete
Applying Rule Changes
When you click Close, TTP immediately scans the file system and implements your rule changes. This may take a few seconds to begin.
Subscription Tiers
Free Plan
- Fully featured
- Maximum of 10 people can be tagged (named)
- Unlimited faces and photos within that limit
Personal Lite Plan
- Fully featured
- Maximum of 100 people can be tagged (named)
- Unlimited faces and photos within that limit
Premium Plan
- Unlimited people
- Unlimited faces and photos
Upgrading: Contact info@tagthatphoto.com to upgrade. All tagging data remains intact during upgrade.
If Your Subscription Expires
The software continues working with these limitations: - Cannot scan new images detected in library folders - Cannot generate new suggestions based on new faces or newly named faces - All existing metadata tags remain in your images - All other features continue to function
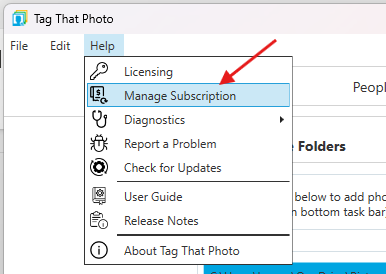
Manage your subscription via the option under the Help menu.
Performance Settings
Background Task CPU Usage

Control how much processing power TTP uses for background tasks:
- Least CPU Usage (Left): Use when you need your computer for other tasks while TTP scans
- Most CPU Usage (Right): Use when running scans overnight or when computer is not in use
- Current Performance: Modern PCs commonly scan about 2,500 to 3,500 images per hour
Scanning speed depends on: - Disk speed (SSDs are fastest) - CPU power - Image size and resolution - Network speed (for NAS drives - WiFi connections are significantly slower than local drives)
Newer releases also scale face detection by available CPU cores (often up to 8 images in parallel on multi-core systems), improving full-library scan and Force Rescan performance.
Face Detection Minimum Face Width

This setting determines the smallest face size that TTP will detect during scanning:
- Default: 120 pixels (works well for most high-resolution images)
- Lower Settings (30-90 pixels): Use for low-resolution images, old photos, or web images
- Higher Settings (150+ pixels): Use for group shots where you don't want background faces detected
Performance Impact: Smaller minimum sizes take longer to scan because TTP must check for more potential faces.
Recognition Quality: Best face recognition results come from faces 150 pixels wide or greater. Adjust based on your specific library needs.
Face Recognition Suggestion Accuracy

Adjust the balance between suggestion quantity and accuracy:
- More Suggestions (Left): More faces will be suggested, but more false positives to correct
- More Accuracy (Right): Fewer suggestions, but higher confidence in matches
Note: After changing this setting, you must tag at least one face before the system displays updated suggestions.
Logging Level

Controls the detail level of system log files:
- Less Logging (Left): Minimum log files, less disk space used
- More Logging (Right): Detailed logs useful for debugging
Note: Logs are automatically maintained for less than one month regardless of setting, limiting disk space consumption.
End of Part 1: Introduction & Getting Started
Continue to Part 2: Scanning and Import...