 |
A
Saddle Lock for the Lathemaster 9x30 Lathe |
This page describes a Vikki
Ford-style Saddle Lock (or Carriage Lock if you prefer) for the lathe.
I chose to do this project next for several reasons. First, I was really
tired of digging out my little Allen wrench to engage the stock saddle
lock. You have to clean out the chips to get at it, half the time it's
underneath the top slide dial, and in general it seems Mickey Mouse. I
am a big believer in engaging the saddle lock to increase rigidity for
facing and other operations. Second, I really like the look of Vikki Ford's
design compared to a lot of others I have seen cruising the web. It has
a very finished and well designed look about it. The pivoting gripper
just seems like it will work better and more smoothly than trying to drive
a gripper up and down on a thread and guide pin. I'm not sure I'll achieve
that total aesthetic, but we will see. Lastly, I wanted to experiment
with milling on the lathe. Vikki's design requires a slot to be milled
in one end of some rectangular stock. I do not have a milling attachment
for my lathe (yet), but somewhere I noticed a fellow was using his Quick
Change Toolholders as little milling fixtures. So, I ordered some end
mills from an eBay seller and set to work on aluminum, which will be another
thing I'm fooling with for the first time.
 |
Part
1: Milling the Slot |
I cut myself a suitable
rectangle of aluminum with the horizontal bandsaw, chucked it up flat
in the 4-jaw, and then proceeded to make facing cuts until it was 0.500"
thick, at which point it fits into my Quick
Change Toolholder slots very nicely. Transfering the aluminum piece
to the toolholder, I stuck a 1/4" endmill into my Buck
6-jaw Chuck. A 6-jaw has a better grip than a 3-jaw, so I reasoned
it would do a better job holding the end mill. Besides all that, it is
my favorite chuck so I never miss an opportunity to put it to use. I set
things up just as you would for facing, except that the work will be moving
into a whirling cutter instead of moving a cutter into the whirling work.
Try saying that 3 times fast!
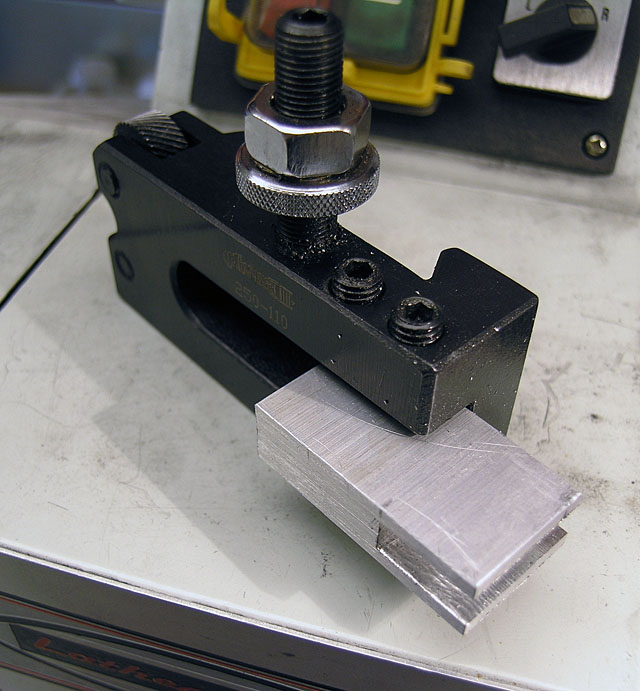
Use a Quick Change Toolholder for Milling...
All in all, the milling
process worked out very well. It was entirely straightforward, and though
I was running the spindle at a pretty good clip, I detected no noticeable
chatter or other ill effects. I love my Lathemaster lathe! I was able
to make cuts on the order of 0.025" or even 0.030" with no problems.
As I was comfortable taking that much on each pass, I did not push things
any further. It is possible the lathe would take even deeper cuts, I just
didn't try.
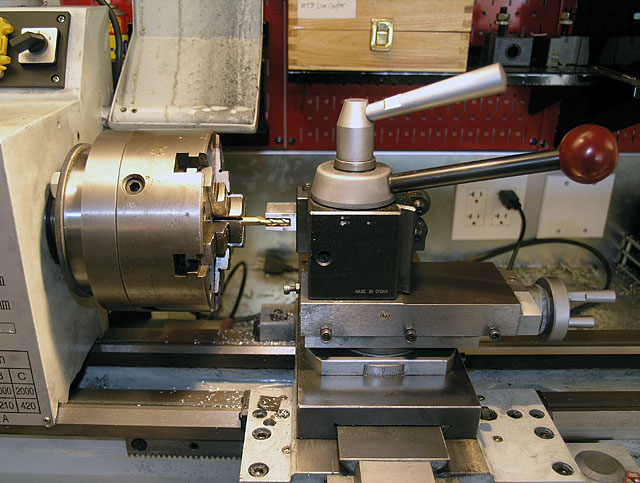
The End Mill Goes In The Chuck...
|
Part
2: Drill the Holes |
We need to drill 3 holes.
There is a hole for the pivot on the gripper that runs side to side. Then
there are two vertical holes. First is the hole for the threaded bolt
that will press down on the gripper pivoting it up to engage the underside
of the ways. This hole will need to be tapped. Second is the mounting
hole for the bracket that holds the carriage lock from above. The mounting
hole must also be tapped.
|
Part
3: Make the Gripper and Pivot Pin |
The Gripper is just a rectangle
of aluminum cut to appropriate size. You will need to drill a hole through
it for the pivot as well. I don't really trust threads in aluminum, so
I use a nut that's concealed between the lathe and the carriage lock to
secure the pin that the gripper pivots on. If you make the body of the
carriage lock from steel, you can thread the steel and potentially avoid
this. One thing to consider is that since we are only able to hold 1/2"
thick items in our "milling vice", you've only got an 1/8"
for threads. You may well prefer my method even for steel rather than
get by on so few threads.
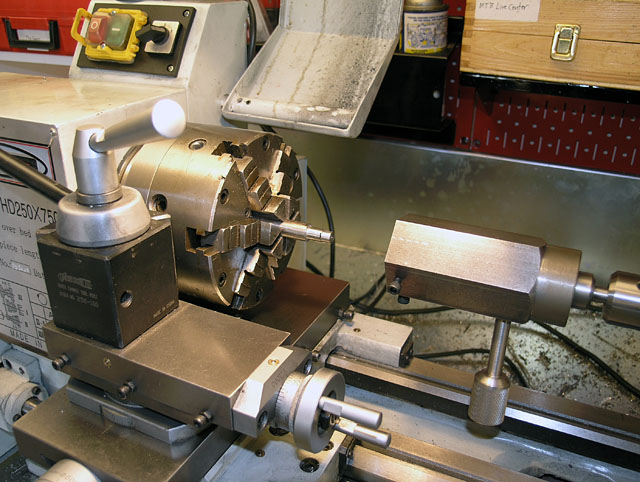
Preparing to Thread The Pivot Pin With Tailstock
Die Holder...
For the gripper's pivot
pin, I turned a little bolt with a shoulder and threaded the end, just
like Vikki Ford. I used stainless steel for the purpose. The pin has a
0.500" head, 0.350" pivot shoulder, and then the threads are
a bit smaller to clear the holes.
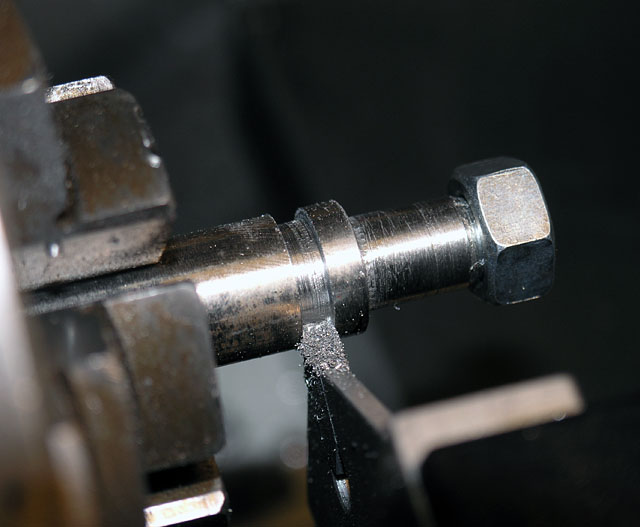
Part Off When Done Threading...
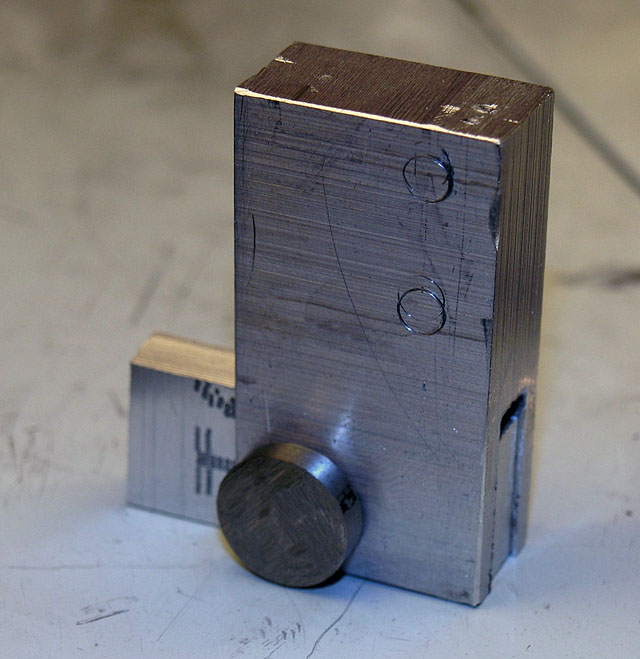
Trial Fitting the Gripper to the Lock Body With
Pivot Pin. Lots of Tool Marks to Clean Up!
|
Part
4: Make the Bracket |
The Saddle Lock Bracket
is another rectangle of aluminum cut to appropriate size. You will need
to drill three holes through it. One matches up to the bolt on the lathe,
one is for the bolt that holds the saddle lock (this time I did tap the
aluminum, so go easy on torquing that bolt!).
|
Part
5: Make the Handle |
For the handle I wanted
to match the style of the other handles on the lathe rather than producing
a ball handle or just a plain Tommy Bar. These handles are just tapered
cylinders. I made mine out of a piece of square steel stock and pressed
and Loctited it onto the top of the Allen head bolt I use to engage the
gripper.
|
Part
6: Install and Enjoy |
Bolt the whole thing together
on the lathe and try it out.
Back to Lathe Central...


